This document may be used as a guide in order to calibrate the Epson WT7900 printer for printing on Epson ClearProof Film. The setup described here is specifically for an Epson WT7900. Paper Profile patches and Linearisation Curves will be generated using Lab mode.
To calibrate a printer the following steps are required:
- Configuring an Output, Media and Pagesetup
- Creating a Paper Profile
- Applying Ink Limits to the Paper Profile
- Linearisation
- Creating and Applying ICC profiles
Note: Before beginning, make sure the printer is running at its optimal level. Check to make sure the heads are clean and printing correctly.
Configuring an Output
Create and save an Output datatype in the Workbench for the Epson WT7900 driver with the relevant settings for Queue, Destination and Collating.
Configuring a Media
The Epson WT7900 will be setup as follows:
- Resolution: 1400 x 1400 dpi
- Colourspace: CMYK
- Use Light Inks: Enabled
- Separate Channels: Enabled
- Media Type: Epson ClearProof Film
- White: Enabled
- White Prints: Last
- White Generation: Fill
- Auto Cutting: Off
Make sure the correct type of ICC profile is assigned for the Output ICC Profile and assign the Output to the Media.
Configuring a Pagesetup
Create and save a Pagesetup datatype in the Workbench for the Epson WT7900 driver with the relevant settings. Assign the Output and Media created earlier. Set the Press ICC Profile to an ISO/Fogra profile and Rendering Intent to Relative or Absolute Colourimetric.
Configuring a Paper Profile
Create a new Paper Profile in the Workbench and assign the Media created earlier. A list of the ink channels and dot sizes (patches) will appear in the Density Patches panel.
Print the chart (All Patches) and allow a minimum of 40 minutes drying time.
The patches will become noticeably lighter once dry. This is due to the white ink layer drying over the other coloured inks.
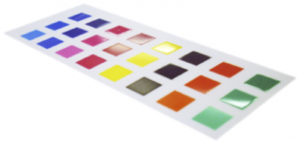
Wet Patches
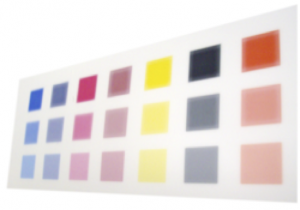
Dry Patches
Measuring the Patches
- Connect one of the supported Spectrophotometers or Densitometers to the Client computer.
- Select the Measure Patches (Lab) option to display a list of supported instruments.
- Select your device from the list and click OK to continue. The Client will connect to the measurement instrument and display the measuring window, with the first patch highlighted and ready to measure.
- Make sure to peel off the film backing before reading the patches and measure against a white background, not on a dark coloured surface.
Note: The density chart should be read in reverse to what appears on screen (right to left). All measurements should be taken from the reverse (non-glossy) side of the film.
- Measure each colour except white (the white backing will become the paper white point).
- Once read, the white L values will be set to zero (0). This means the output will be very black.
- Select the white patches on the paper profile and measure the same white area four (4) times for each of the patches. The L value for the white patches will measure in the high 80s-90s.
- Change the L value for white patch #2 to 60; #3 to 30 and #4 to 5. Leave the default value for patch #1.
- Select the patches to be turned off. A visual review of the patches is preferred over relying on the values represented in the paper profile chart. See the screenshot for the patch selection.
Note: The Max Ink options for white should not be changed. Leave at the default values as defined by the driver and resolution.
Save once the patches have been selected and assign the Paper Profile to the Media.
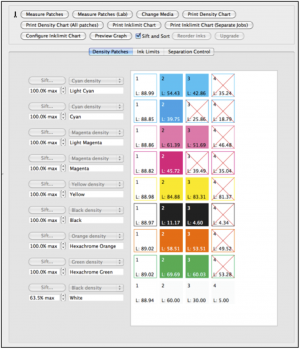
Applying Ink Limits to the Paper Profile
- Print the InkLimit Chart
- To determine the limits, view the chart as soon as it has been printed. Limit the inks based on patches visually dry, like a standard paper profile for non-film media. Patches on film media will appear lighter due to the white ink when dry.
- Click on the Ink Limits tab above the Density Patches display area.
- Click on Configure Ink Limit Chart. This will display a popup configuration window, showing the number of ink limits in the configuration and the inks used.
- Configure the settings as per the screenshot displayed here:
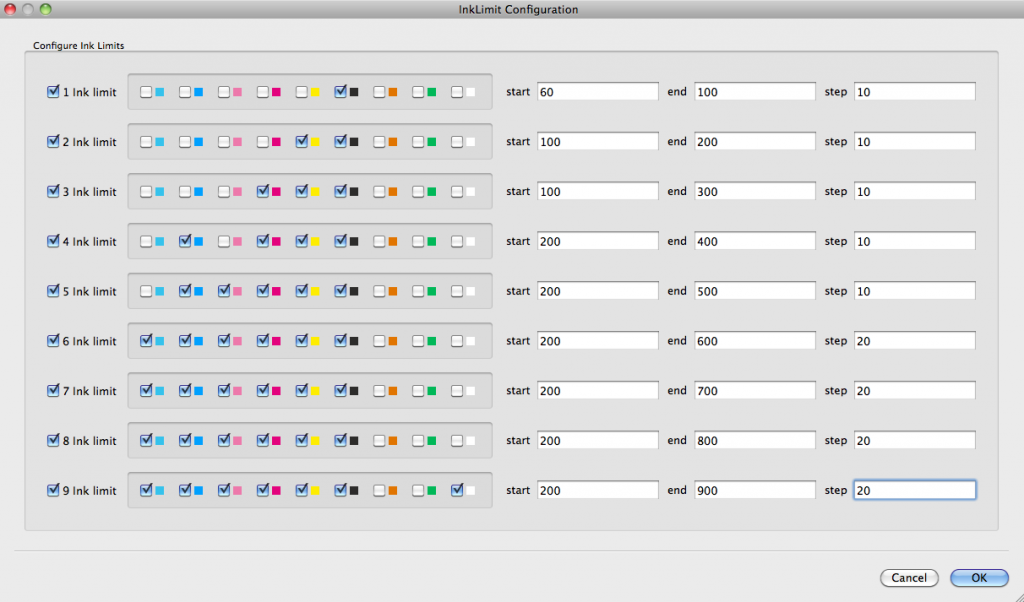
- Inks 2-9 are enabled and white is included in every limit.
- Click OK when done.
Separation Control
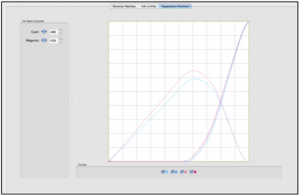
- Click on the Separation Control tab to display the panel (if using Separation Control).
- Adjust the curves so the light and dark inks for Cyan and Magenta intersect at 80%, maintaining smooth curves.
- Save the Paper Profile one the separation control has been set. This will be automatically updated in the Media.
Linearisation
Once the Paper Profile has been created and saved against the Media, the printer needs to be linearised. This brings the printer to a neutral, known state.
All colour management (except for the Paper Profile) is disabled when the linearisation chart is printed. This allows for quick linearisation updates, without having to remember to disable ICC’s, correction curves, etc.
Before printing the linearisation chart:
- Go to the Pagesetup in the Workbench for the Epson WT7900 printer.
- Scroll to the Media Effects panel and enable the Mirror option.
Printing the Linearisation chart
- Open the Lineariser application by selecting Application menu > Lineariser.
- Select the Media from the list of available items and check the Use Lab tickbox.
- Select the instrument to be used and print the chart.
- Once printed, allow the chart to dry for a minimum of 40 minutes before any reading begins.
Reading the Linearisation Chart
Depending on the device used, the patch or strip to be measured will be highlighted.
- As the media being used is film, the chart should be read from the reverse (non-glossy) side.
- Measure each strip or patch in turn, following the instructions at the bottom of the Lineariser screen.
- To re-measure a strip, select it again and measure.
- When all readings have been completed, click Submit.
- Enter a name for the linearisation and save the curve. Once saved, it is automatically applied and saved against the Media datatype.
Creating and Applying ICC Profiles
With the Media now linearised, the next step is to create an ICC profile.
- Print the ICC Target via the Submit menu > ICC Target option.
- Once printed, allow a minimum of 40 minutes drying time.
- Once the chart is ready, peel off the backing paper and measure it, according to the profiling software’s instructions and create your ICC profile.
- Save the profile and assign it against the Media in the Workbench. Save the Media settings.
- Go to the Pagesetup in the Workbench and enable/tick the Always Use ICC under the ICC Profiles panel. Save the Pagesetup.
Your printer is now ready to accept jobs.
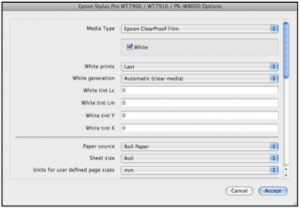
Note: In most cases, the White Generation option in the Media custom settings should now be changed to Automatic (Clear Media).
Additional Notes
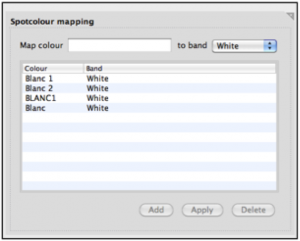
Spotcolour Mapping
A panel – Spotcolour Mapping – will appear in the Media datatype when using the white ink printer driver.
This is used for any jobs that have a white plate. The plate will need to be mapped here in order to be recognised and be correctly printed.
Note: The White Generation setting in the Media custom settings will be overriden by the correctly mapped white plate in a job (via the Spotcolour Mapping option). A job will only print white where there is a white plate.
To check the white plate has worked before printing, view the Rendered/Printed Preview of the job in SoftProof. The ink channels option will show the white plate and values.
Using Metallic Film
For the majority of jobs using metallic film:
- The Media Type should be left as Epson ClearProof Film.
- White: Enabled.
- White Prints: First.
- White Generation: Use Fill for calibration and switch to Automatic (opaque media) for normal use.
- Disable any Mirroring effects in the Pagesetup.
