
Serendipity Blackmagic / Veripress 8.1+ adds an Lab (Multi) colour space option to Special and Replace Colour Sets.
The option allows Lab spot colours to be specifically characterised, defining the Lab values of the colour at different coverage levels (Tints) ranging from 0% (paper/substrate) through to 100% (solid). Defining these values, where they are known, enables the colour management system to reproduce your special colours with even greater accuracy.
Lab (Multi) colours can be created manually in the Special / Replace Colour Set, or imported from compatible CxF or PDF/X-4 files containing spot colours with ink characterisation data.
Technical note – ISO 17972-4 defines a subset of CxF (CxF/X-4) used to characterise spot colours and embed them in PDF 2.0 files.
Defining Lab (Multi) Special / Replace Colours
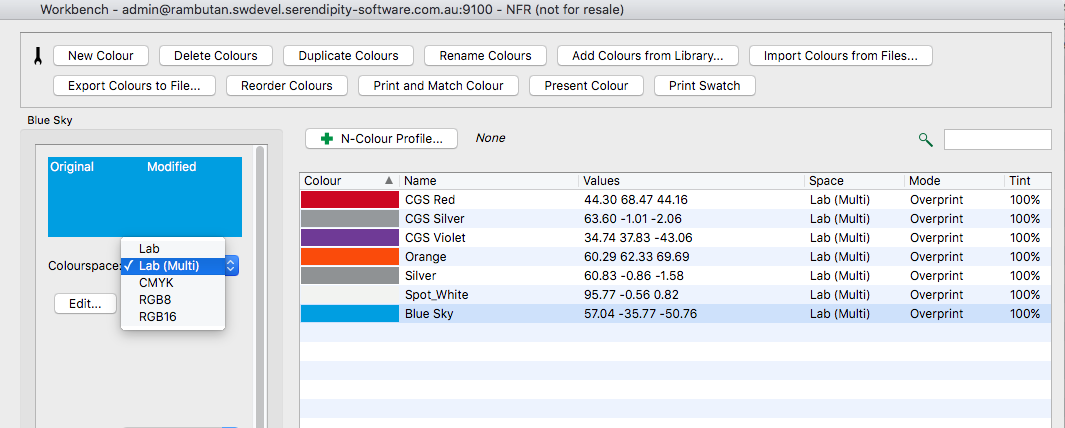
Accessing and defining a special/spot colour as an Lab (Multi) colour, can be as simple as changing the colour space of an existing Lab special to Lab (Multi) via the Colourspace drop-down menu in the Colour Adjustment panel.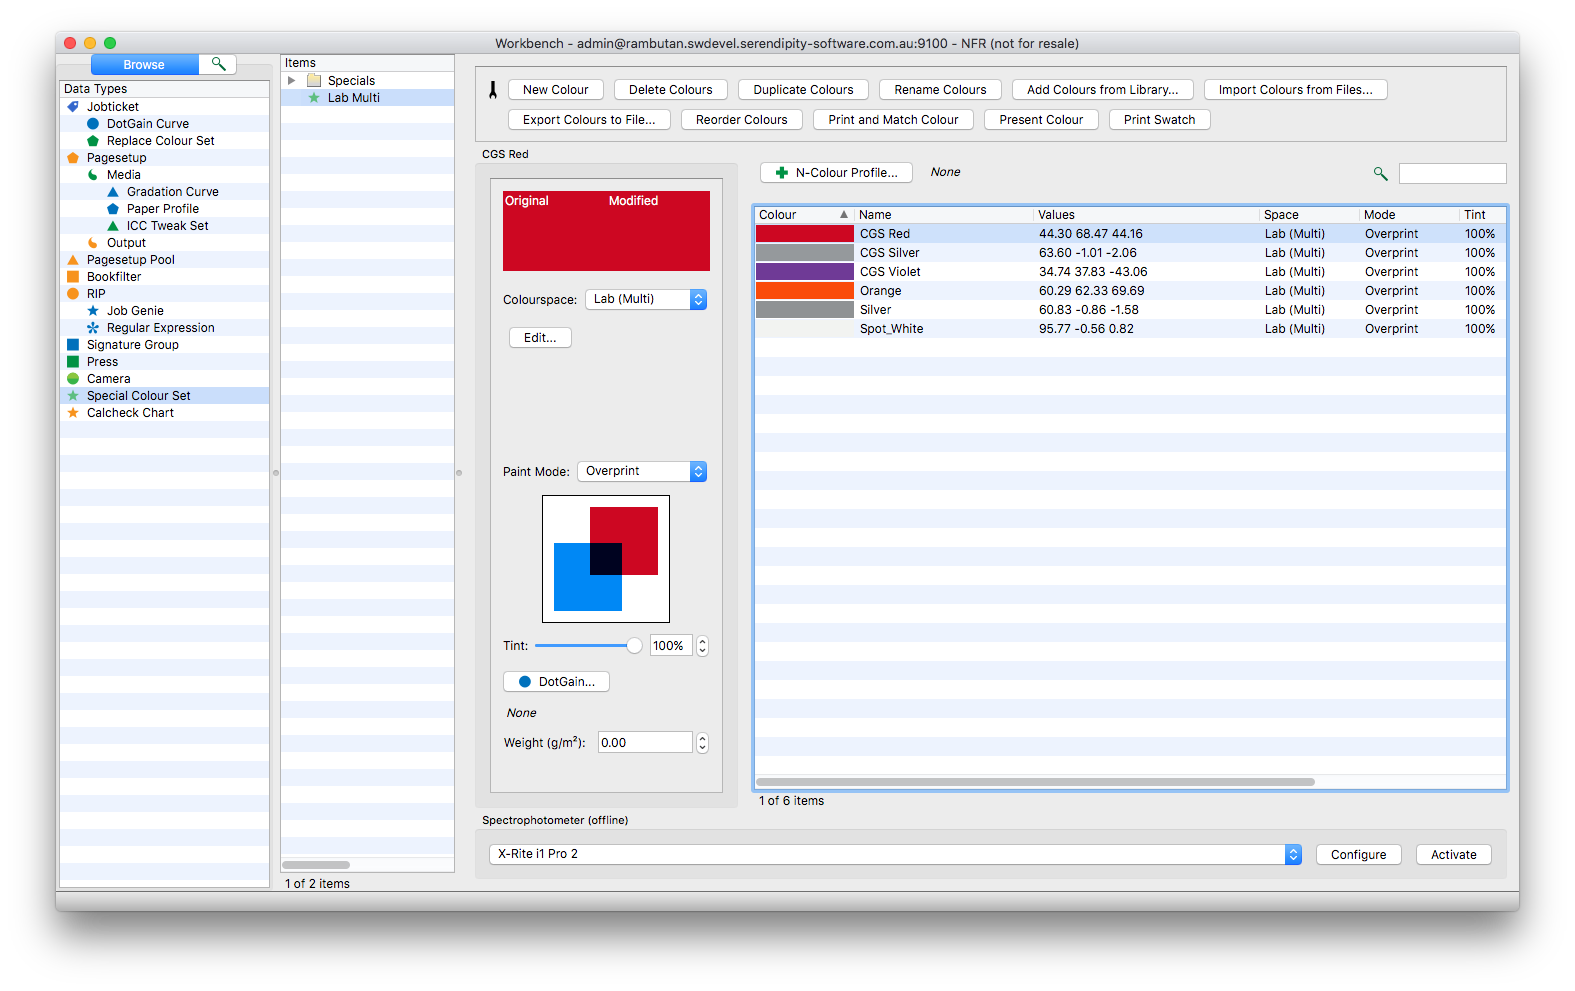
Creating a New Lab (Multi) Special / Replace Colour
To create a new Lab (Multi) special or replace colour:
- Add a new colour to the Colour List using
- The New Colour button in the toolbar, then defining the Name and solid (100% tint) Lab values.
- Or, the Add Colours from Library… button in the toolbar to import an Lab colour from an existing Colour Set.
- Select Lab (Multi) from the Colourpace drop-down menu
Configuring an Lab (Multi) Special / Replace Colour
To configure, adjust, and add new tint level definitions to an Lab (Multi) colour:
- Click the Edit… button to open the Lab (Multi) Configuration window.
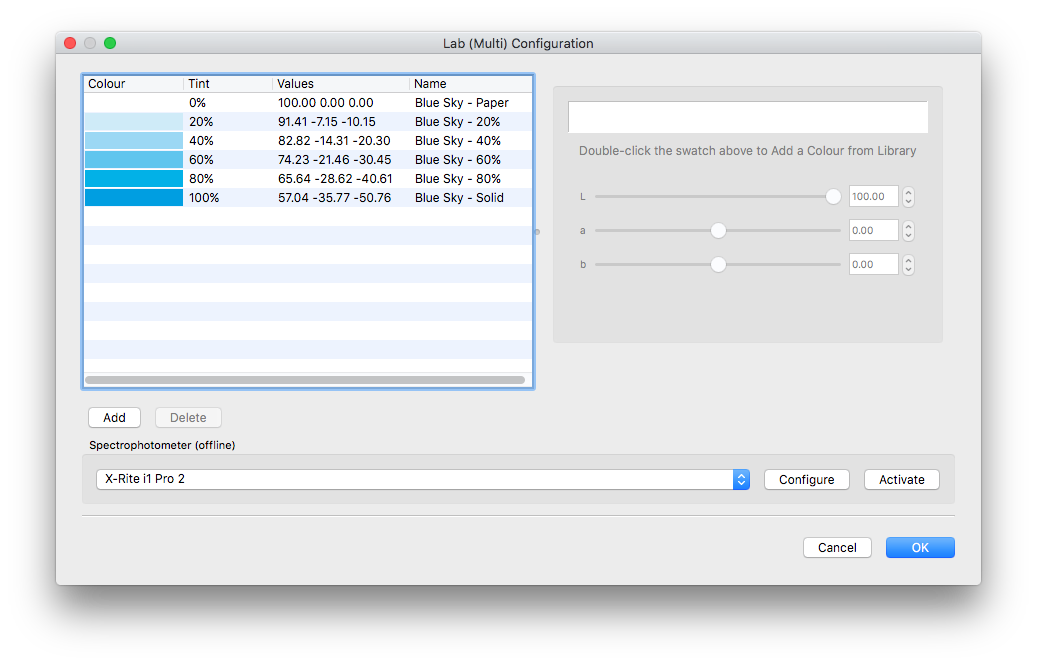
New colours are created with a set of interpolated Lab values for 20%, 40%, 60% and 80% tint levels.
- Click the Add button at the bottom of the Colour List Panel to define a new Tint Percentage in the field presented.
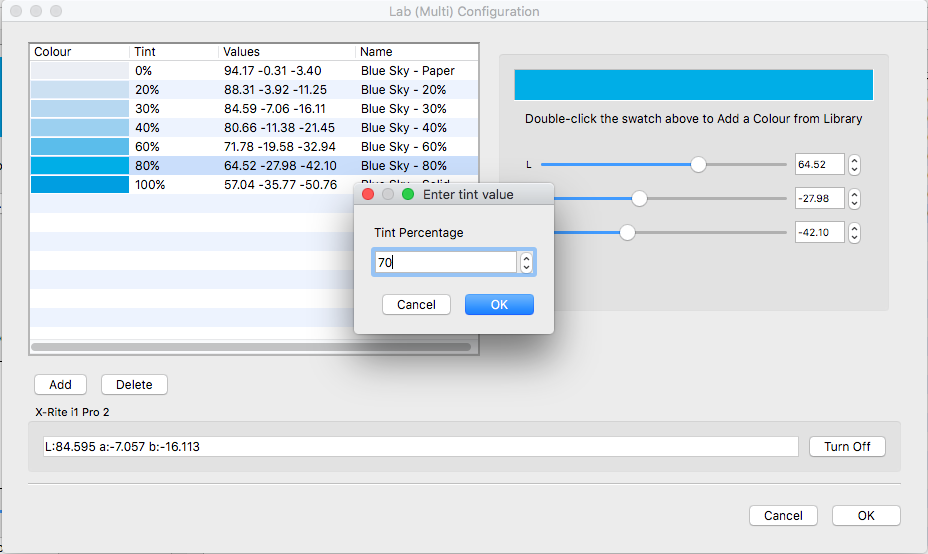
- Click OK. The new tint level will appear in the list with a default set of interpolated Lab values.
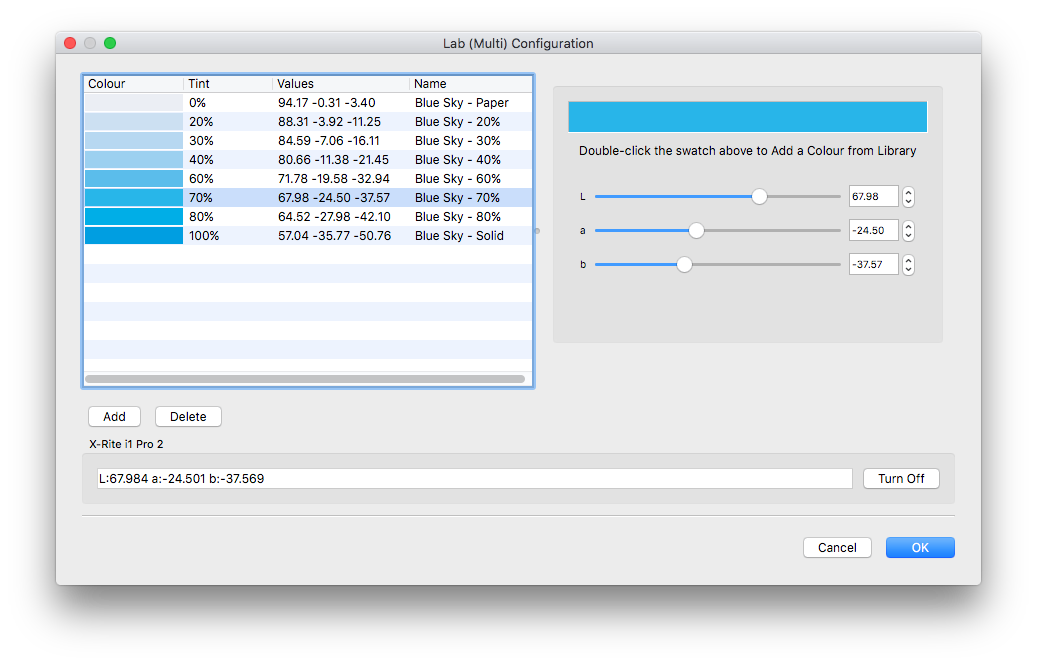
- Select an individual Tint % in the Colour List to adjust the Lab values by
- Moving the L / a / b sliders.
- Typing values into the corresponding numeric fields, or by using the up/down arrows.
- Double clicking on the large (top-right) colour swatch and Adding a colour from an existing Special Colour Set.
- Using a supported Spectrophotometer to measure the Lab values from printed material. (See below)
- Select an individual Tint % in the Colour List and click the Delete button to remove the characterisation point from the colour.
Measuring Tint % Lab values using a Spectrophotometer
To measure Lab values for a Tint % using a supported Spectrophotometer:
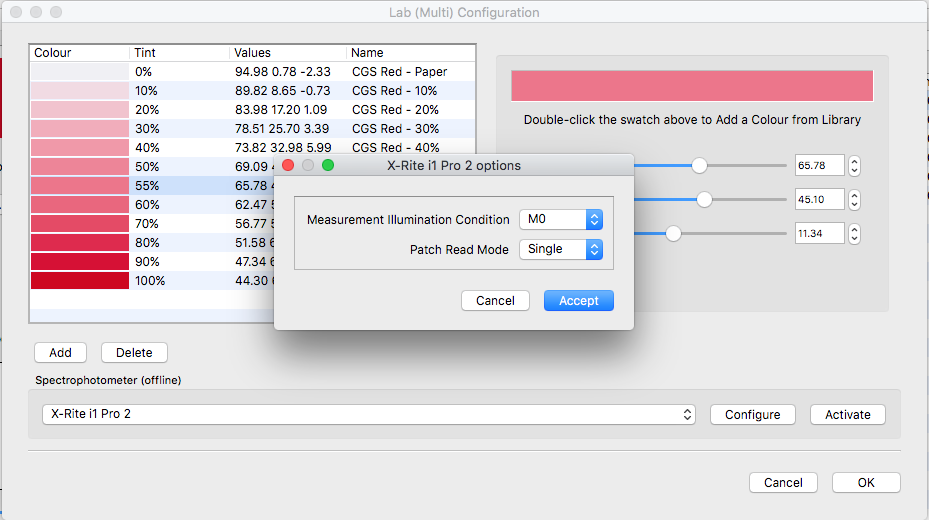
- Connect the instrument to the Client machine.
- Select the device in the Spectrophotometer drop-down menu.

- Click the Configure button (if available) to
- Set the Measurement Illuminant Condition
- Choose Patch Read Mode: Single, then click Accept.
- Click the Activate button then follow the on-screen directions to calibrate the instrument.
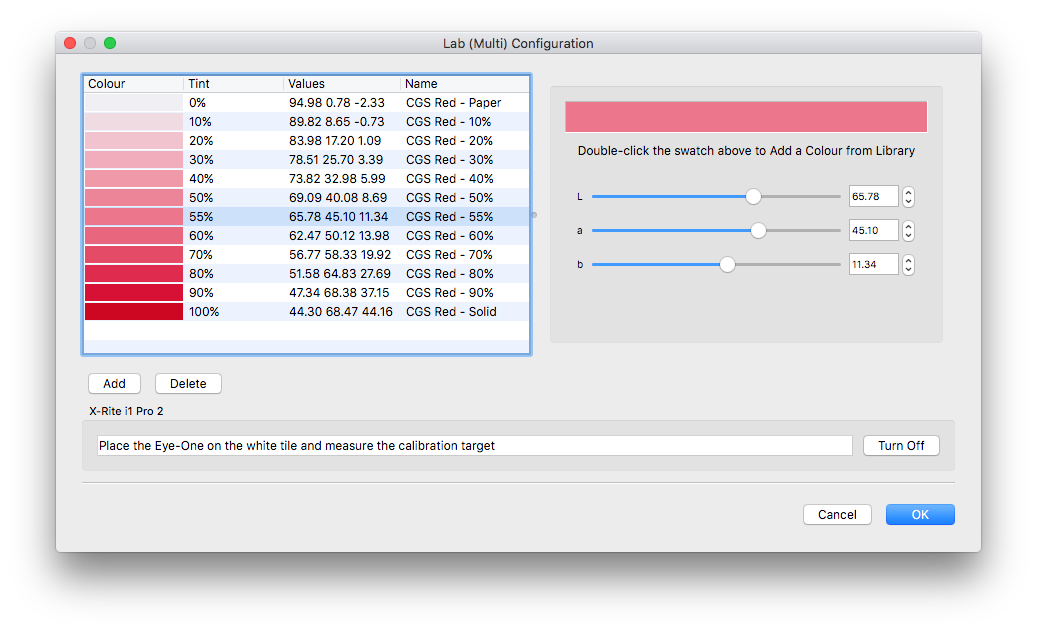
- Select the desired Tint % from the Colour List, then take the measurement with the spectrophotometer. The read Lab values will be applied to the Tint %.
- Repeat the previous step for each Tint %.
Importing Special Colours with Characterisation Data
Spot colours with defined characterisation data can be imported into a Special / Replace Colour colour set in one of two ways:
Importing from an X-Rite Color Exchange Format (CxF) file
To import colours from a CxF file:
- Click on the Import Colours from Files… button in the toolbar.
- Navigate to the CxF file in the Import Swatches window, then click Open.
- An Import swatches as …? list window will pop-up, select either Auto Detect or X-Rite CxF from the Swatch Types list, then click Select.
The colour(s) will be imported into your Special or Replace Colour Set. Lab colours with characterisation data will be displayed as having an Lab (Multi) colour space.
Importing colours embedded in a PDF 2.0 file
PDF 2.0 files can contain embedded spot colours that include characterisation data. To import the spots from these files:
- Assign an Unknown Specials set in Server Settings.
- If required, create a New Special Colour Set in the Workbench.
- Open Server Settings via the Client > Server menu > Server Settings option.
- In Server Settings, go to the Colour tab > Special Colours panel
- Click the Unknown Specials button, choose the Special Colour Set, then click OK.
- Click OK to close Server Settings.
- Next Submit the PDF file to your chosen Pagesetup, but before doing so
- Go to the Jobticket to be used in the Workbench
- In the Postscript / PDF Options panel, ensure the Use CMYK Simulation from PDF for Unknown Colours is ticked, then Save the Jobticket.
- Submit the PDF 2.0 file to the Pagesetup.
Note – it is not necessary to actually print the file at this point. So you may want to Pause the printer Queue and then Cancel the job when it’s finished Imaging and Rendering.
Any spot colours in the PDF2.0 file will now have been added to your assigned Unknown Specials set.
To add them to your system default Special Colours, or any other Special / Replace Colour set:
- Open the Special Colour Set in the Workbench.
- Click the Add Colours from Library… button.
- Select the set used for Unknown Specials from the list.
- Select the Lab (Multi) spot colours you wish to import, then click OK.
- The colours will have been added to your Special / Replace Colour Set, Save the set.
Exporting Special Colours with Characterisation Data
Lab (Multi) spot colours can be exported from Special / Replace Colour Sets as CxF files, maintaining their characterisation data.
To export Lab (Multi) Colours:
- Click the Export Colours to File… button in the toolbar.
- Choose X-Rite CxF in the Export swatches as…? window, then click Select.
- Name the file in the Export Swatches file dialog window, then click Save.
Note: If the set contains a mix of CMYK/N-colour and Lab colours, a prompt to export either CMYK/N-colour or Lab colours will appear – select Lab. The file standard limits exported colours to one colourspace.
Lab (Multi) spot colour tint characterisation data is not part of the CGATS file standard. To retain the tint data, sets with Lab Multi spot colours must be exported in X-Rite CxF format. If exported in ISO 12642 (CGATS) format, Lab (Multi) tints (excluding 0% – Paper) are exported as individual spot colours.