The following guide will build on the How To Submit Files for De-Imposition documentation and add some extra functionality. We will be using the files located in the deimposition_guide.zip file also available for download.
For saddle stitch and perfect bound jobs we can print paired pages and fold them. For an A4 job this means printing on an A3 sheet and folding it into 16 sections.
Configuration
The first stage is to configure the Media, Output and Pagesetup in the Workbench.
Media Configuration
- Select Media from the datatypes list in the Workbench and create a new one. Give it a name you will remember.
- Select the Output Driver as Hewlett Packard PCL5 Colour (for this example).
- Select your resolution and set colourspace as CMYK.
- Change the paper size in the Custom settings to A3.
- Allocate an Output ICC profile, ensuring it is a CMYK one.
- Save the Media configuration.
Output Configuration
- Select Output from the datatypes list in the Workbench and create a new one. Give it a name you will remember.
- Select the same Output Driver as done with the Media and configure the destination driver settings.
- Select Duplexing under Collation Method and save the Output configuration.
Pagesetup Configuration
- Select Pagesetup from the datatypes list in the Workbench and create a new one. Give it a name you will remember.
- Click the Change Output button and allocate the Output created above to the Pagesetup. Do the same for the Change Media button.
- Set up your ICC profiles as required and save the Pagesetup configuration.
Once the above has been done the next stage is to configure a RIP to poll the files. This is optional as you are able to submit the Serendipity Blackmagic Image files via the Submit menu > Files For Deimposition option. A RIP will be required for any jobs using a dedicated input filter.
RIP Configuration
- Select RIP from the datatypes list in the Workbench and create a new one. Give it a name you will remember (for this example: BMImage Local).
- Select Serendipity Blackmagic Image from the list of available RIP drivers.
- Enable Polling, select the method as Localhost and set the Poll Interval to 1000h (hrs). We do not need to continually look for new files so a long poll time is fine.
- Create a new path to the folder where the RIPped image files are located.
- Click the Test button and Save and Test when prompted. Make sure the test returns a result of “Polling OK”. If not, correct any errors until the test is successful.
Once the RIP has been configured, use the RIPMonitor to see the polled pages and make sure they view correctly.
- Select the RIPMonitor from the Modules menu or select it in your Jobs/Monitor window if already enabled.
- Choose the RIP BMImage Local and make sure Polling is On.
- Click the Poll button three (3) times consecutively.
Any jobs should appear in the RIPMonitor after the three polls have completed. If they do not appear you will need to review your RIP configuration and try again.
The jobs will only show a single black plate as the input filter does not parse the job looking for plates. Once the jobs appear you are ready to move to the next stage.
Importing the Signature
The next stage is to import the signatures used to de-impose the job.
The Signature Group has a number of import filters for the various imposition packages supported. To import your own signature, choose the filter that matches. For this example we are importing Dynastrip signatures.
- Select the Signature Group datatype from the list in the Workbench and create a new one. Give it a name you will remember.
- Make sure that the Selective Import option is not enabled and click the Dynastrip button.
- Browse to the location of the signature file, select it and click Open.
Our example will import two (2) signatures. Each signature will be an 8UP – one for the front (marked with a +) and one for the back (marked with a -).
- Confirm the signatures have the correct orientation, rotate if required and Save the Signature Group.
You are now ready to pair the pages.

Pairing Pages
Within the Signature Group:
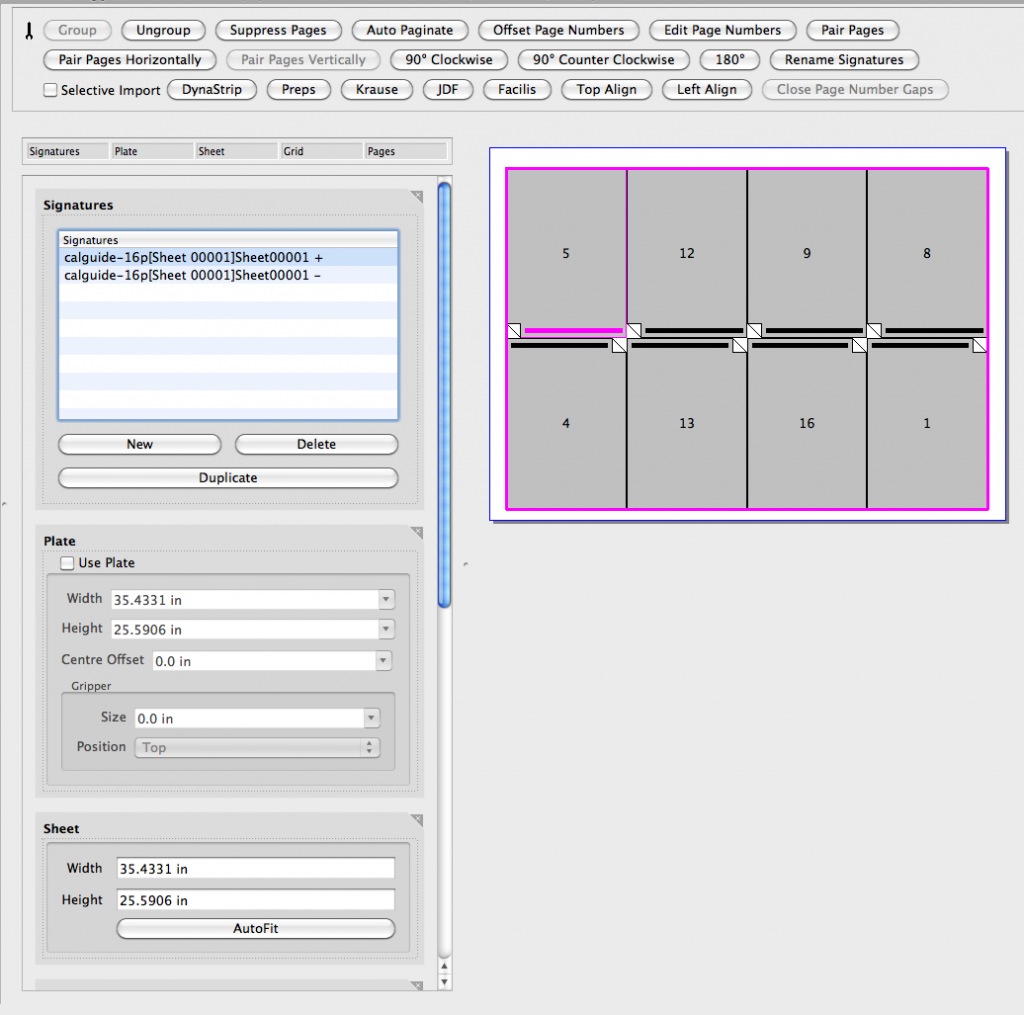
- Select the first signature in the list under the Signatures panel and click on page 4 (if you are using the Serendipity example files).
The first thing you will notice is a pink line around the whole signature and the individual page. This means that the pages are all grouped together. For pages to be grouped certain criteria must be true; most importantly they must be the same size and positionally in-line with each other. Pages must group for any pairing to occur.
There are two page pairing buttons available – Pair Pages Horizontally / Pair Pages Vertically. For this example the Pair Pages Horizontally button is not available due to the head direction being in the opposite direction. Heads must be in the same direction within a pair. Selecting another page from the other signature will give the same result.
Our example is a 16-page 8UP A4 imposition. By pairing the pages within the signature and forming one page from two we are changing the de-impose area of the job.
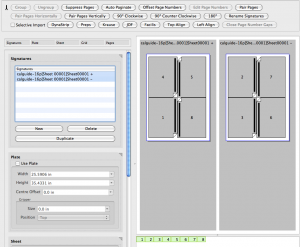
- Select page 4 in the first signature and click the Pair Pages Vertically button.
- The pages will pair and take the lowest page number from the pair and assign it to the new page.
- Once the pages have been paired repeat the procedure for the other signature file.
- Save the Signature Group when done.
You are now ready to submit the jobs for de-imposition.

Submitting for De-Imposition
Now the jobs are in the RIPMonitor and the signature has been imported, we are ready to submit the jobs.
- Select the RIP BMImage Local in the RIPMonitor.
- Highlight the two jobs called calguide-16pS0001B and calguide-16pS0001F in the list.
- Click on the Submit for Deimposition button.
- Select your Pagesetup and Media for processing the files (created earlier).
- Give the publication a name, enable Hold After Imaging and click Next.
- Select the jobs in the list and click the Signature Group button.
- Allocate the Signature Group to the files. The pages should display in green and be complete from page 1 to page 8 when correctly assigned. The pages will appear purple/red if the same signature has been assigned to each page. Adjust this via the dropdown accordingly to ensure the correct signatures are assigned to the pages.
- Once correct, submit the files for processing.
The job’s progress can be viewed in the QueueManager.
Checking the Imaged File
Once the jobs have passed through the imaging process they will be in “Held (Rendering)” state in the QueueManager as we ticked/enabled the Hold After Imaging box.
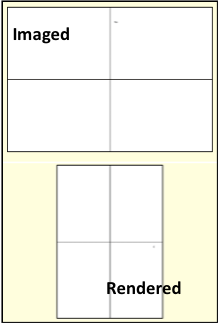
This gives you the opportunity to view the Imaged file against the signatures to see if they fit and make any adjustments if required before rendering takes place.
- Select both jobs in the QueueManager list and click the View Imaged/Original button. This will open a SoftProof window with both images displayed.
- Resize the images so they both fit within the screen.
- Select the Publications widget on the left sidebar menu or Tools > Publications.
- Enable the Show Signature option under Imposition to display the signature overlay on the Imaged files in SoftProof. This will allow you to see if any rotation is required. The signatures can be edited via the Edit button if required.
- Once you are happy with the jobs release them to be rendered and ready for duplexing.
- In the print queue for the A3 output, select pages 3-8 and hold them.
- Duplex and output pages 1 and 2 making sure there is A3 paper in the printer.
- Check the printed output. Depending on the printer’s duplexing module you may have the correct output. For this example, the Xante has incorrect orientation and adjustments will need to be made.
- Select one of the pages from the job just printed, eg. Page 1.
- Right-click and select Configure > Edit Pagesetup > Sheet Attributes.
- Change the Rotation to 90 degrees and click OK to apply the changes and close the window.
- Select both jobs (pages 1 and 2) and render again. This will now rotate the pages during the rendering phase.
- Once rendering has finished, duplex the jobs and check the output. The pages should now be in the correct orientation however the back side may be 180 degrees to the front page. This is caused by the duplexing mode (binding) set in the Media custom settings.
- To change the duplexing mode, select the first page from the job again, right-click and select Configure > Edit Media > Output.
- Click Edit in the Custom Settings panel and change the Duplexing mode to be Short Edge Binding.
- Click Accept and OK to save the changes and close the window.
- Select both jobs again (pages 1 and 2) and render once more. The pages should now back up correctly.
The final thing to check is the centering for the A3 pages. To do this we need to find the printable area of the page.
Finding the Printable Page Area
- Create a job with the same page size as the duplexed job. In this example it is an A3 job.
- Draw a cross from edge to edge through the middle in both the horizontal and vertical directions.
- Duplex and print the job to the queue used previously.
- When the job has printed, measure the length of both lines. This indicates the printable area of the page.

- Open the Pagesetup and go to the Sheet panel. The easiest option for updating the Pagesetup is to right-click, select Configure > Edit Pagesetup > Sheet Attributes.
- Enter the width and height of the printable area. The important thing to remember is that rotation occurs before centering, so the width and height are transposed. Check the job info from the printed job (for page dimension checking). These are printed in W x H order so you can use it as a guide.
- Enable both of the centering options for Vertical and Horizontal.
- Save/Apply the changes, render both jobs again and duplex to see the results.
Once the job is centred you can print the whole publication. Either submit the job again for de-imposition or select the pages in the QueueManager and render them again.
Only jobs in a “Done” state can be re-rendered. Any “Waiting to Duplex” will need to be cancelled and then submitted for rendering again.
How To Create a Folding Sheet
When using the de-imposition feature, the resulting output is a completed publication, e.g., a book or a magazine. To get to that stage we have imported the signature templates used to create the job and we have used the RIPped job as the incoming data.
Some users still like to have the imposed sheet, backed-up in hardcopy so they can fold it themselves. This is very easy to produce and for this How To, we will take the same job and signature as in the How To Output Paired De-Imposition and print them on the Xante in a reduced format.
The first step is to create the Pagesetup in order to shrink the job.
- Select Pagesetup in the Workbench datatypes list, locate the one created for the previous How To (above) and duplicate it.
- Change the name to distinguish the Pagesetup as the A3 reduced imposition.
- Scroll to the Sheet panel and change the fitting method to “Fit Width & Height”. The width and height settings should already be listed from the previous configuration, so this will now shrink the page proportionally to fit in the defined area.
- Select Rotation of None as the job is imaging in the correct output orientation and there is no need to rotate it further.
- The centering options should also still be enabled so the pages back up correctly.
- Save the Pagesetup when done.
The next step is to submit the jobs via the RIPMonitor.
- Go to the RIPMonitor and select the RIP list with the jobs in it. Make sure the sort order has the front sheet above the back.
- Select both jobs and click the Submit button. This will display the standard Submit window.
- Select the Pagesetup and Media combination to send the job to for processing.
- Enter a publication name and set the First Page to 1.
- Click Submit to finish and send the jobs for processing.
As we ensured the front sheet was first in the list this will be assigned the first page number, which in this case is 1. All subsequent pages are numbered accordingly in order.
The jobs will follow the same course as before only this time no deimposition takes place. The jobs will fall through to the print queue and go into a “Waiting to Duplex” state.
- Duplex the jobs and print them out to see the output.
- Open the image in SoftProof to view the back page as a show-through to check your job.
The job can also be sent to A4 size sheet just as easily, following the same principles as outlined above. Make sure that you view the rendered output prior to duplexing and printing to check for correct orientation. If not, rotate the page and submit the job again.
If you do not need to rotate the job, submit the job again from the RIPMonitor, otherwise the size will be smaller. This is due to the imaged file already being in a reduced state to fit width and height so the rotated output would be smaller still.

