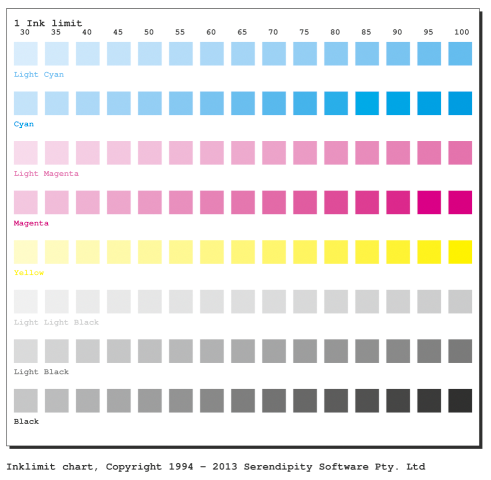
Users may find when calibrating printers with a high normal print resolution, i.e. 1200 x 1200 dpi or above, that severe Paper Profile Ink Limiting is required in order to prevent flooding.
The necessity to Ink Limit 2+ ink channels on these devices to within a 100%-150% range can make them difficult to calibrate and ultimately limit the colour gamut available to the printer.
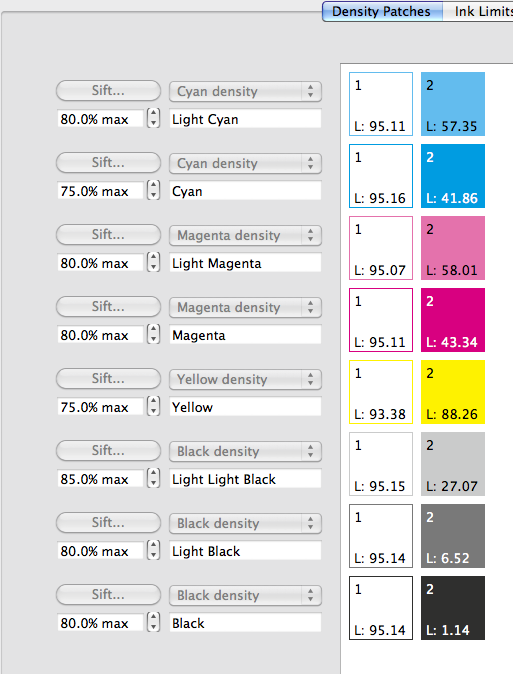
Making use of the Maximum Ink Setting in the Density Patches tab of the Paper Profile is a good way open up the printer gamut in these cases.
Maximum Ink is a “low level” setting applied during screening. It sets an ink coverage limit for each ink channel by introducing white space into areas of coverage higher than the set limit. The default setting is 100%, i.e., no limiting. Setting a Max Ink level lower than 100% effectively makes the lower number the new “100% coverage” for that channel.
This doesn’t mean an area won’t be visually 100% covered by the ink channel, because at high resolutions the dot gain of the ink fills the white spaces introduced by maxiumum ink setting.
To calibrate a printer using Maximum Ink:-
Follow all the normal Output, Media and Pagesetup creation steps. (See the “How to Calibrate your Printer” knowledge base article)
Create a Paper Profile for the Media to be used. Print and measure ink Density Patches.
Select dots/patches (if the printer is variable dot), then assign the Paper Profile to the Media.
Before proceeding to Configure and Print an Ink Limit chart as part of the regular ink limiting procedure…
1. Reconfigure the Ink Limit chart to print the 1 ink limits only, turn off all the other ink limits.
2. Tick all the ink channels in the 1 ink limit set the start to 30, set the end to 100 and the step to 5.
3. Print out the Ink Limit chart
 4. Examine the patches in each channel for the point at which the ink completely fills the patch with no white showing.
Note – some users may wish to measure the Ink Limit patches using a spectrophotometer for the point at which there ceases to be any significant change in Lab values between patches of higher coverage levels. Patch hue can also be used as a guide, e.g. picking a patch that Cyan at a lower coverage level over a higher coverage patch that looks ‘blue’.
5. In the Density Patches tab, set the Maximum Ink for each ink channel to the coverage percentage of the patch selected in the Ink Limit Chart.
From this point on, return to standard Ink Limiting, Linearisation and profiling procedures.
Ink Limits can now be set to higher levels with an increased separation of limits between numbers of channels.


