
Serendipity Blackmagic / Veripress 8.1.01+ adds a new Minimum Dot % simulation feature to print and soft proofing workflows. This feature’s primary function is to simulate the effects of drop-off in Flexographic print.
Drop-off is a term used to describe the point at which small dot coverage percentages are unable to be reproduced in the flexographic print process. At these dot sizes, the screens used for plate making are unable to allow sufficient light through to the photopolymer, resulting in the small amounts of chemical present to be washed off the plates. Typically, this occurs at a dot coverage of around 3% or less.
Minimum Dot % simulation can only be applied when proofing contone files.
Applying Minimum Dot to Printed Proofs (Serendipity Blackmagic)
The Minimum Dot % setting for print proofing is located in Jobticket.
The value entered is the minimum percentage required for an input dot (colour channel value) to become visible, and be printed in an output proof.
The option is applied during rendering phase, prior to the application of dot gain curves. It removes any dot coverage areas on each plate (process or spot colour channel) less than the configured percentage value. e.g. Setting the value to 3% will remove coverage areas below 3% for each colour of the job.
To apply a Minimum Dot % to your printed proofs:
- Open the Jobticket in the Workbench.
- Select the Input Colours panel of the Jobticket
- Type a value, or use the arrows to enter a #.#% percentage value in the Minimum Dot field.
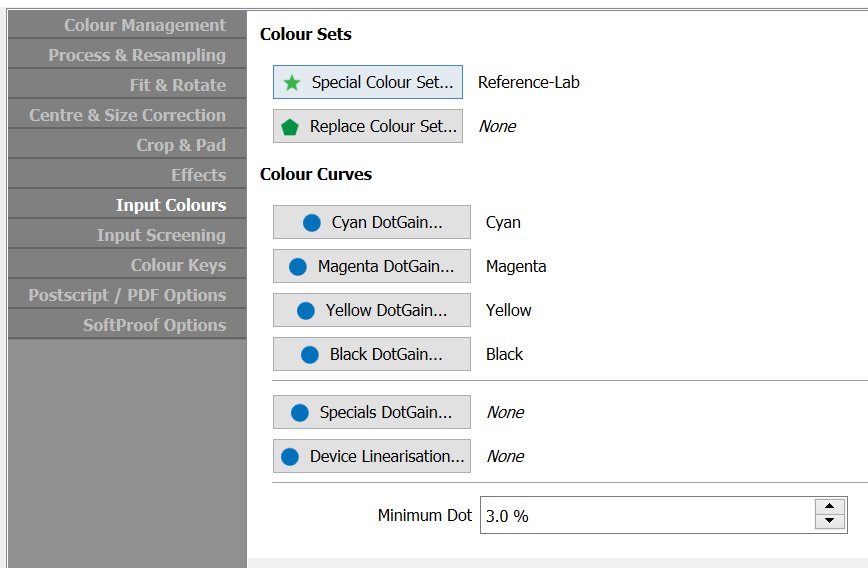
- Save the Jobticket.

Configuring Minimum Dot settings for Soft Proofing (Veripress / Blackmagic Soft Proofing Add-on)
The Minimum Dot % value setting for soft proofing is located in the Press.
Toggling the Minimum Dot % Simulation button in SoftProof or Touch Console, when viewing a job using the Press, will remove or highlight any dot coverage areas for each plate (process or spot colour channel) less than the configured percentage value. e.g. Setting the value to 3% will remove coverage areas below 3% for each colour of the job.
This option is only available to Veripress and Serendipity Blackmagic w/Soft Proofing Add-on.
Setting Minimum Dot % in the SoftProof Press
- Open the Press to be used for SoftProof in the Workbench.
- Select the Press Curves panel of the Press
- Type a value, or use the arrows to enter a #.#% percentage value in the Minimum Dot field.
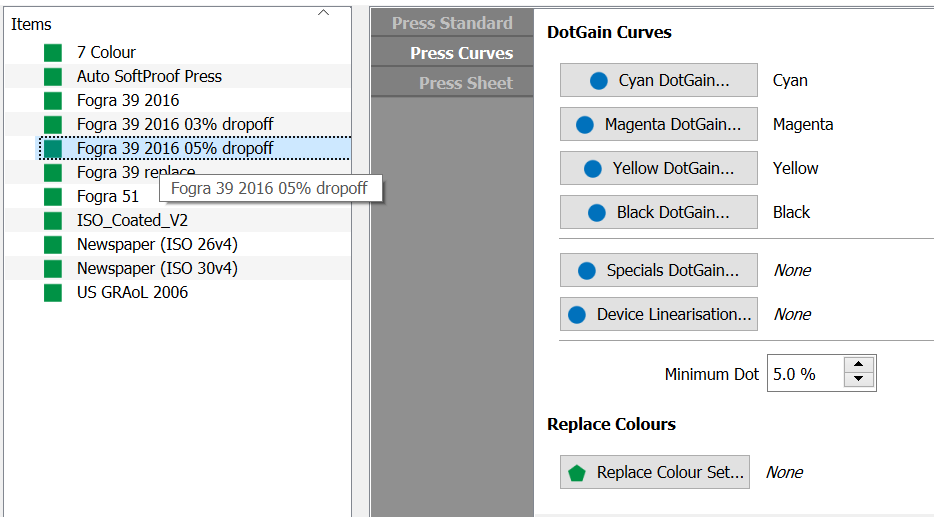
- Save the Press.

Setting the Minimum Dot % Simulation viewing method for SoftProof
- Open a SoftProof window, by selecting Application menu > SoftProof.
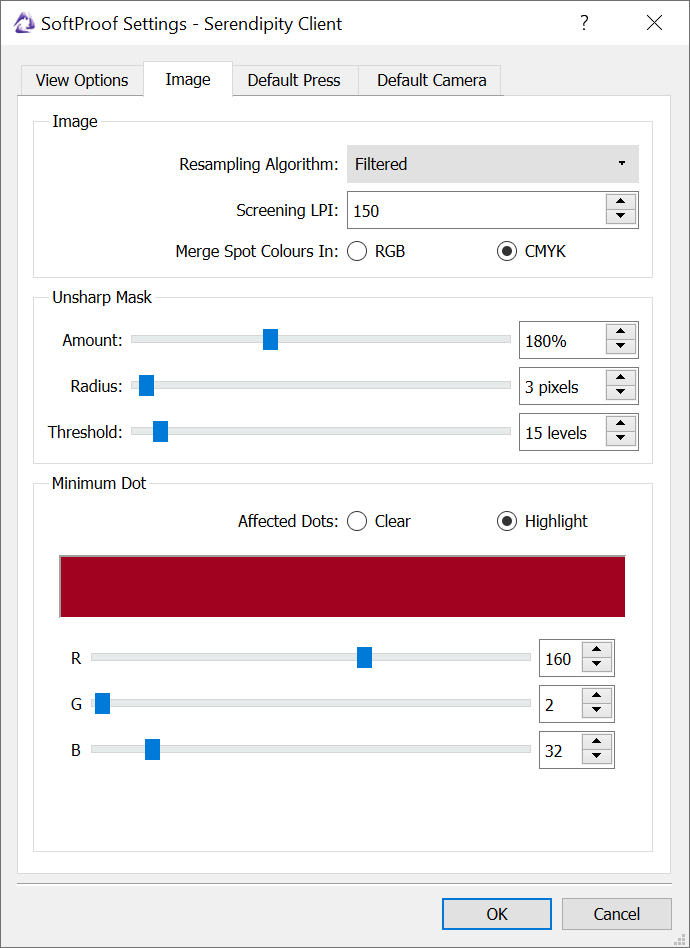
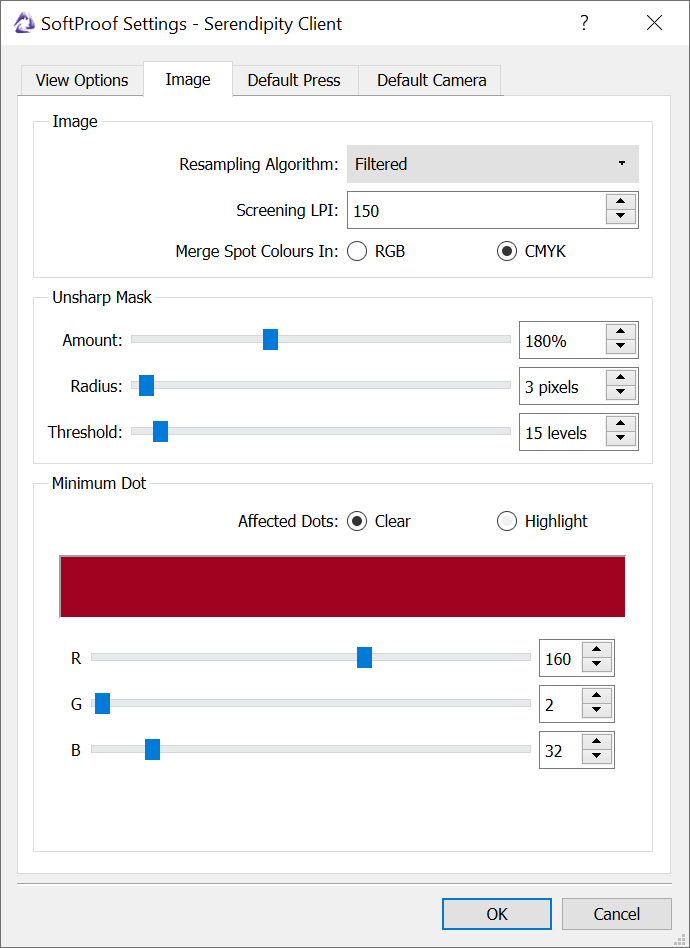
- In the SoftProof window, select File menu > SoftProof Settings.
- Select the Image tab of the SoftProof Settings pop-up window. The lower panel of the Image tab has the display options for Minimum Dot.
- Select the Affected Dots: Highlight option to display areas of an on-screen proof with coverage levels below the Press configured Minimum Dot % value, in the colour defined by the RGB sliders/text field/arrows.
- Or, select the Affected Dots: Clear option to remove areas of an on-screen proof with coverage levels below the Minimum Dot % value configured in the Press. This option simulates the way the final printed/press result will appear.
- Select the Affected Dots: Highlight option to display areas of an on-screen proof with coverage levels below the Press configured Minimum Dot % value, in the colour defined by the RGB sliders/text field/arrows.
- Click OK to save your Minimum Dot viewing method.
- Close the SoftProof window.


Using the Minimum Dot % Simulation function for Soft Proofing
While viewing a proof in the SoftProof window:
- Assign the Press configured with a Minimum Dot value (above) via the Press button in the Status Bar (if the Press has not already been set to the Default Press in SoftProof settings).
- Activate Minimum Dot % Simulation view by
- Selecting the View menu > Minimum Dot % Simulation option.
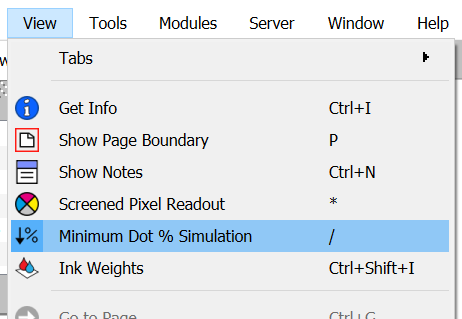
- Clicking the forward slash “/” hotkey.
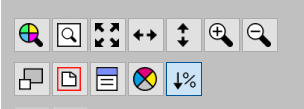
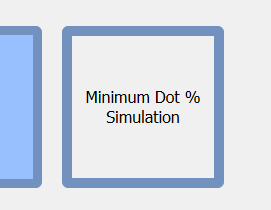
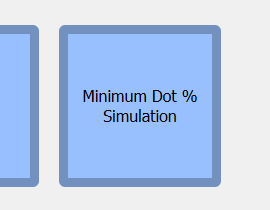
- Or, if the SoftProof window Tools are visible (Tab key toggle), click the Minimum Dot % Simulation button in the View buttons below the Navigation thumbnail.

- Selecting the View menu > Minimum Dot % Simulation option.


Using the Minimum Dot % Simulation function with a Touch Console
- Load the Publication, Book or Job via the Touch Console
- Assign the Press configured with the Minimum Dot % value (above), via the Press Config button (if the Press has not already been set to the Default Press in SoftProof settings).
- Click the Minimum Dot % Simulation button in the Main screen to toggle the view.


Examples of Minimum Dot % Simulation in SoftProof
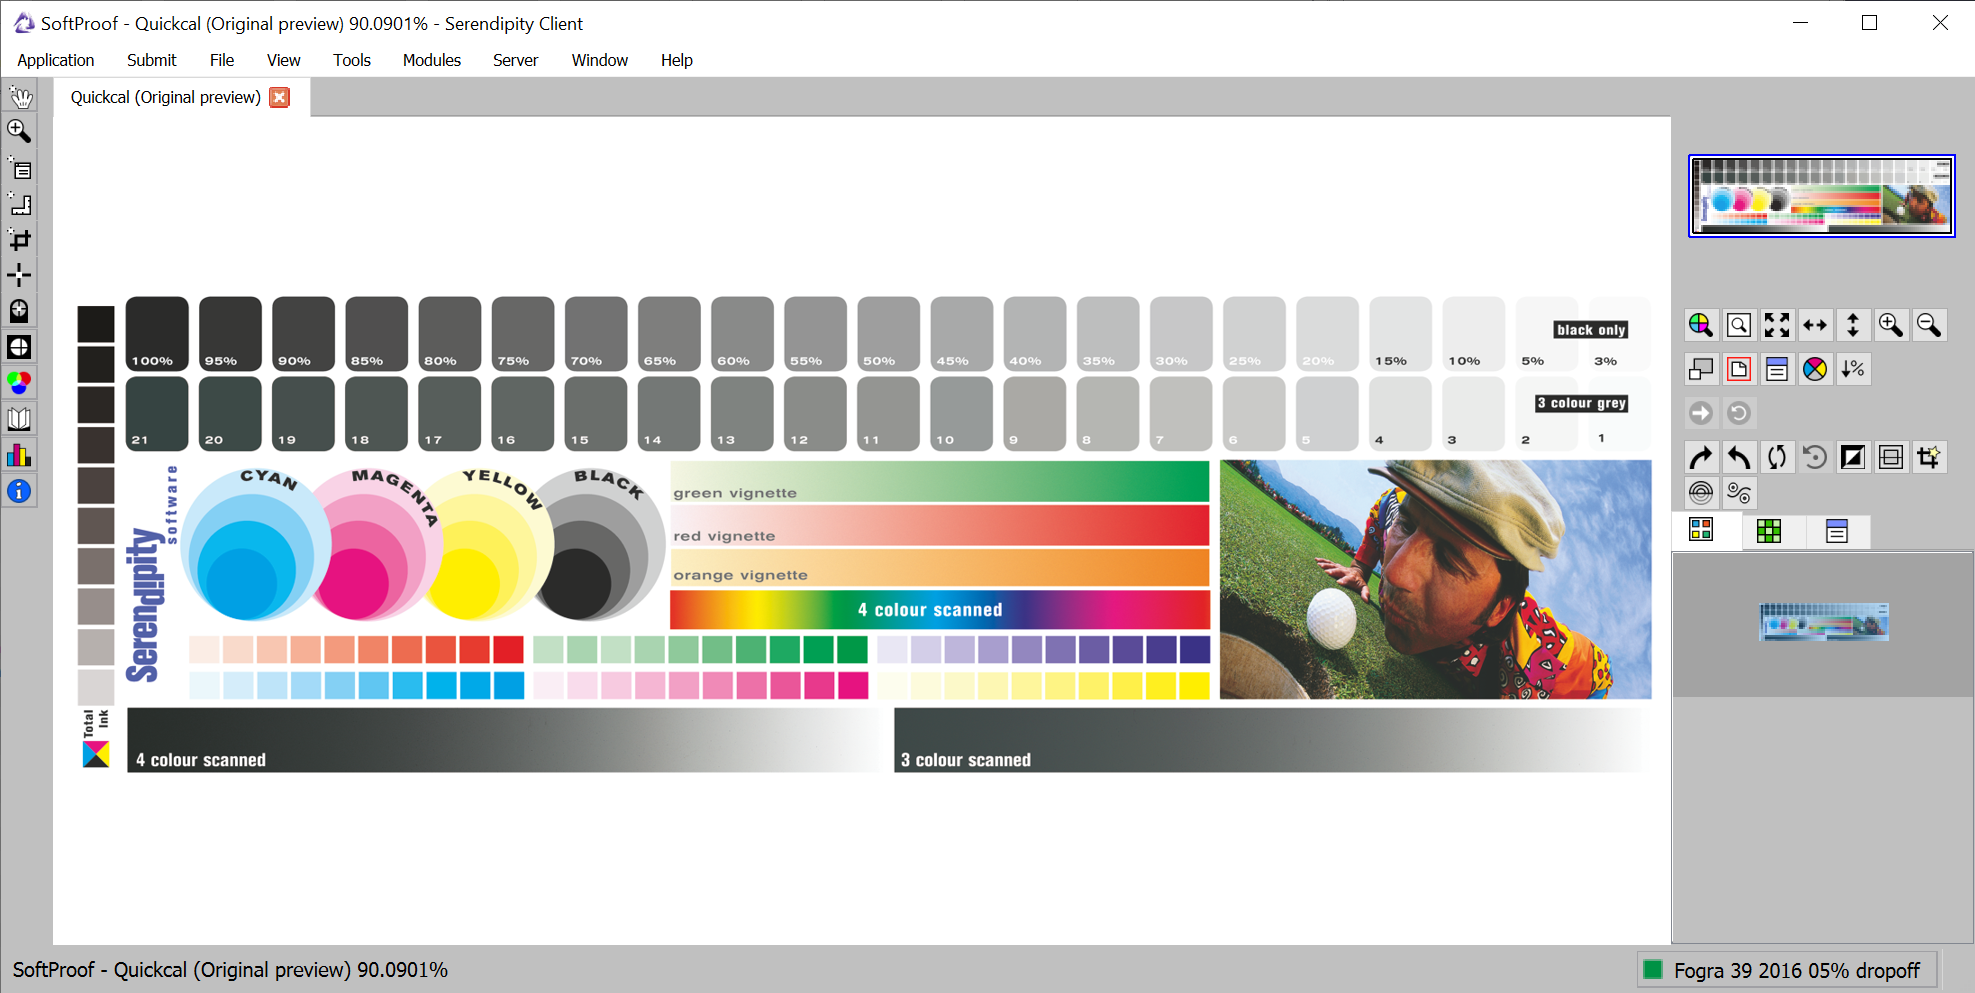
QuickCal viewed in SoftProof
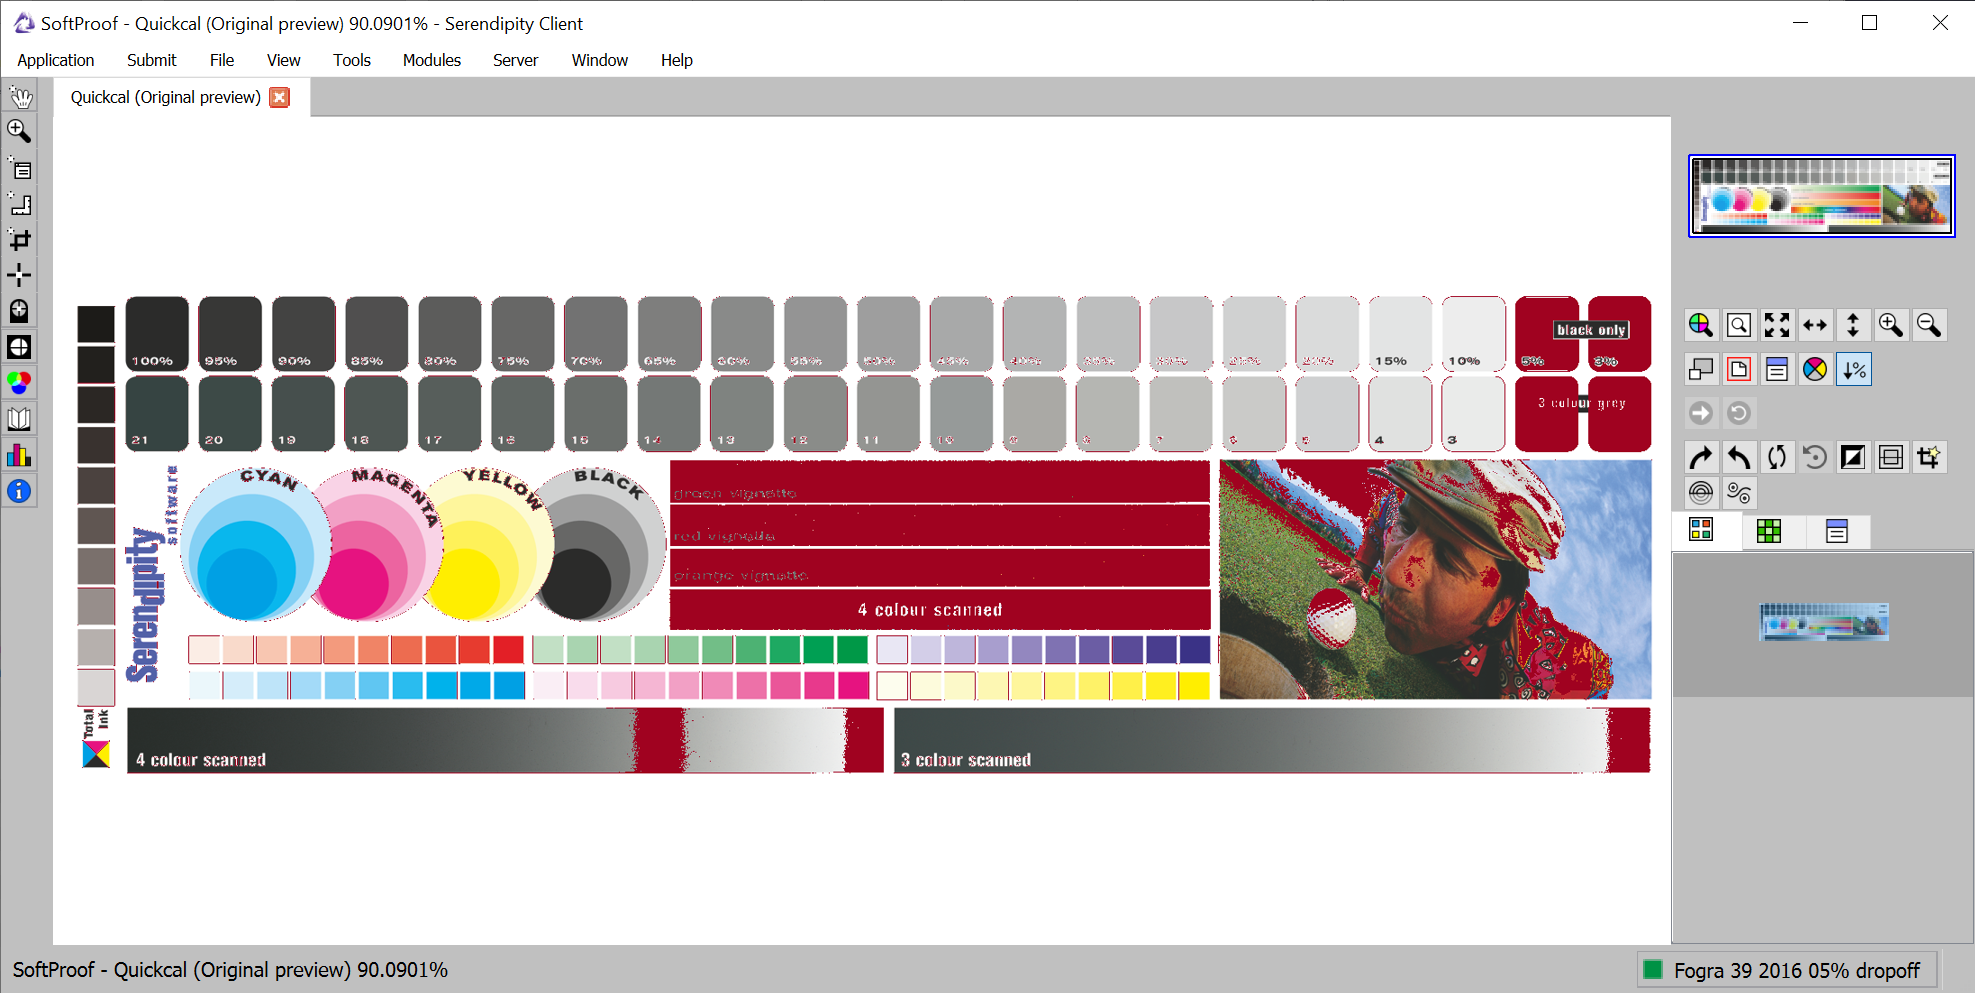
QuickCal viewed with a 5% Minimum Dot Simulation active, in Highlight Mode.
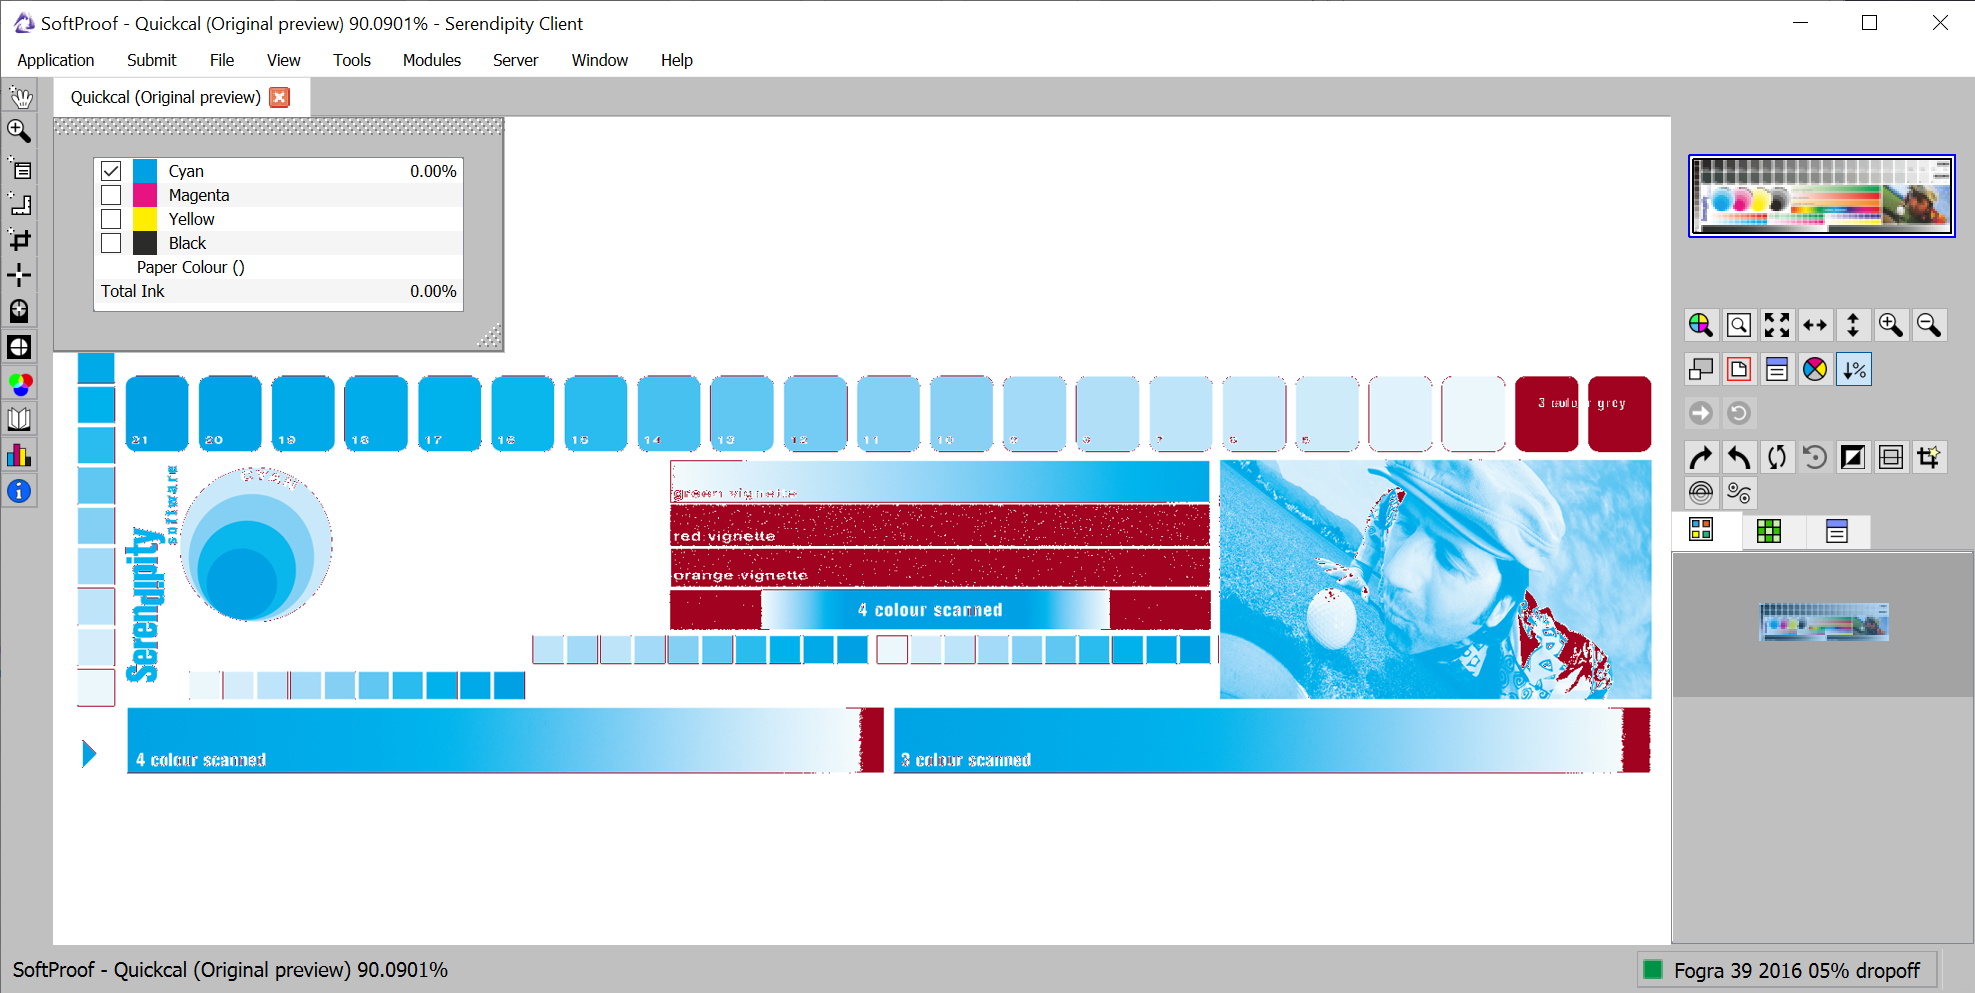
QuickCal – Cyan channel viewed with a 5% Minimum Dot Simulation active, in Highlight Mode.

QuickCal viewed with a 5% Minimum Dot Simulation active, in Clear Mode.