Serendipity Blackmagic 7.0.01 introduced the Assign Pagesize render effect to Jobticket.
The effect assigns any jobs submitted using the Jobticket to an output page size based on nearest – less than or equal to – fit according to its dimensions.
Output Page sizes are configured in a list of Sheet only signatures saved to a Signature Group in the Workbench database. As such, the functionality is only available to Serendipity Blackmagic users.
Following is an example of how to create a list of output page sizes and assign them to a Jobticket:
Create the list of Page Sizes
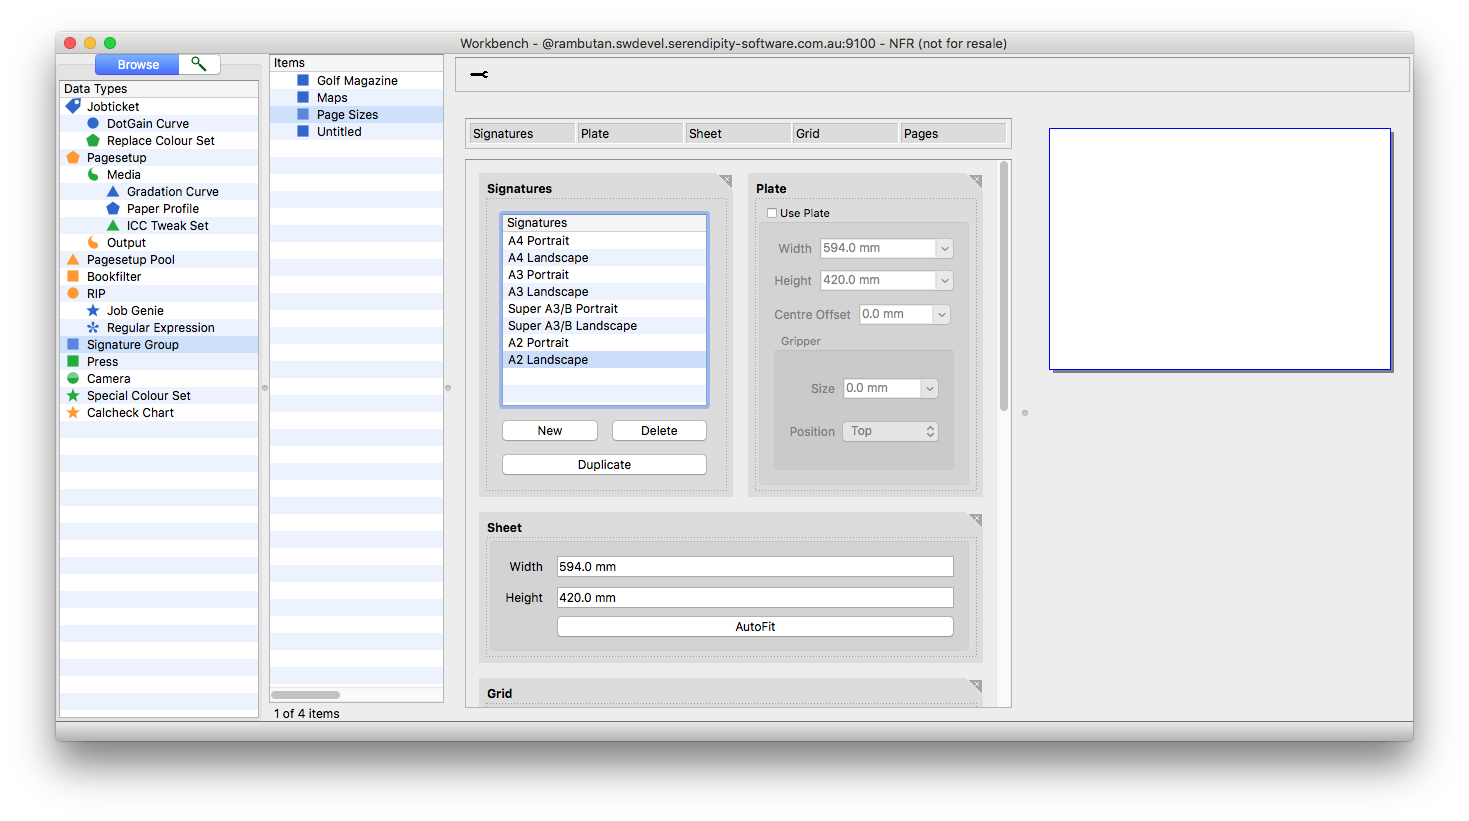
- Open the Workbench application, select the Signature Group Data Type, then create and name a new Signature Group.
- Select the Signature Group in the Item list.
- Click the New button at the bottom on the Signature panel in the Signature Group to create the first page. Name the Signature (page size) as desired.
- In the Plate panel, check the Use Plate option is disabled (unticked).
- In the Sheet panel, enter the Width and Height of the output page size to be printed.
- In the Grid panel, click the Delete button at the bottom left to clear any grid options.
- The Pages panel is not used.
- Repeat steps 3 thru 6 to create all the output page sizes required for your workflow.

- Save the Signature Group.
Note – Jobs are not auto-rotated at rendering to fit within the page sizes in the list. If necessary, create two signatures for each page size, one portrait and one landscape.
Assign the Signature Group to the Jobticket
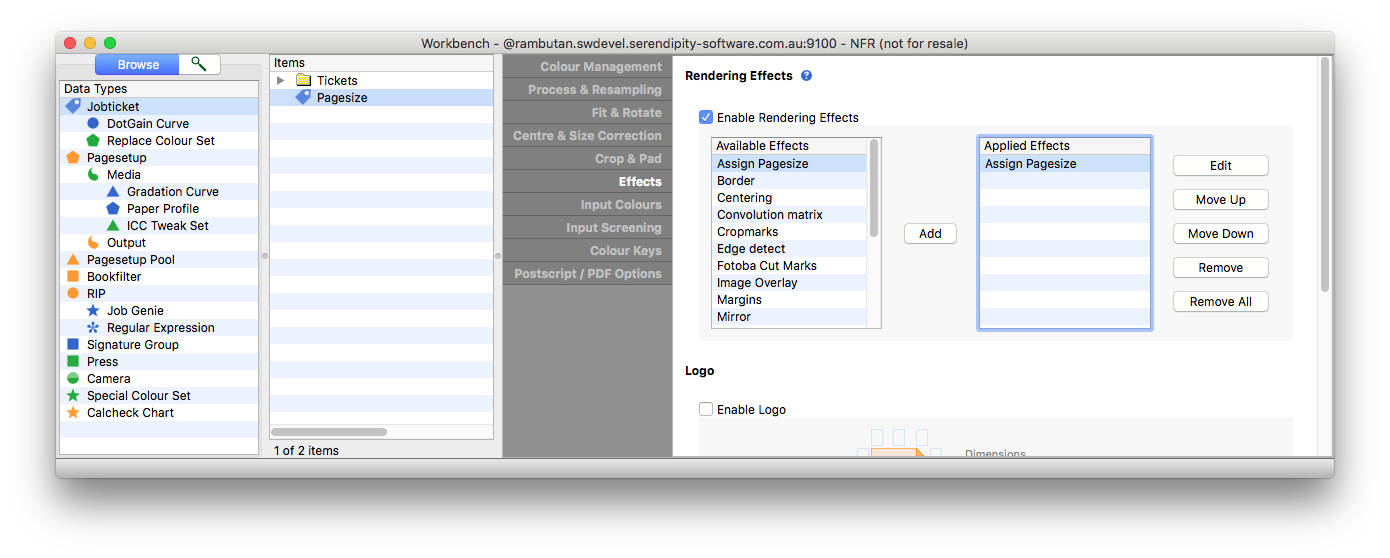
- In the Workbench application, select the Jobticket Data Type, then create a new Jobticket or edit an existing one.
- Select the Jobticket in the Item list, then choose the Effects tab in the configuration panel.
- Tick the Enable Rendering Effects checkbox.
- Select Assign Pagesize in the Available Effects list, then click the Add button to add it to the Applied Effects list.

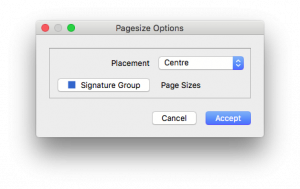
- Double-click on the Assign Pagesize effect to Edit it. A Pagesize Options pop-up window will open.

- In the Pagesize Options window
- choose a page Placement option, from the drop-down menu, for the jobs as they are assigned to a page size.
- click the Signature Group button, select the Signature Group from the list in the pop-up chooser window, then click OK.
- click Accept
- Configure the other parts of the Jobticket for your workflow, then Save it.
Note – Rendering Effects are always applied the order they are listed in Applied Effects. Effects listed before the Assign Pagesize will be taken into account when placing and selecting a page size for a job.


