Megarip Pagesetup’s can be set up as Windows system printer destinations to allow jobs to be easily submitted via the Print option of third party software or design packages.
Jobs printed to a published pagesetup will be automatically sent for processing and colour management in Megarip, eliminating the need for dropfolders or manual file submission.
Note: Jobs printed via Megarip in this way must be in a file input format available to your Megarip version. The option to print files from any application is not available for Megarip Raster versions of the software.
Megarip Printer Driver
The first step before proceeding is to enable access to the Megarip.inf driver file. The Megarip printer driver is a proprietary Serendipity Software driver that Windows will use as the printer driver.
The file is located on the Serendipity Megarip installation DVD in the following location: /drivers/win/win_xp_vista_7/
or it can be downloaded from the Serendipity Software website.
Configuring the Pagesetup for Publishing as a System Printer
- In the Workbench select the Pagesetup to be published from the list of available items.
- Go to the Publish panel and enable the checkbox for TCP Port: Activate port number option.
- Enter the TCP port number in the field and save the Pagesetup.
 Note on Port Numbers: It is recommended that the port number assigned to a Pagesetup is a port over 10000 to avoid conflict with the operating system or an existing application. Each pagesetup to be published needs its own unique port number, for example, 10200, 10201, etc.
Asset Queue: The Asset Queue publishes itself to port number 9104. Jobs printed to this TCP port are placed in the Asset Queue.
Note on Media: When submitting jobs to a published Pagesetup the default Media assigned to the Pagesetup is used. If you wish to publish to different Media (paper type & configuration) on the same printer each Media required needs to be assigned its own Pagesetup with its own unique port number.
Creating a TCP/IP Windows System Printer
A system printer needs to be created and configured on the Windows computer that is running the Megarip Server.
- Select Windows Start menu > Devices and Printers.
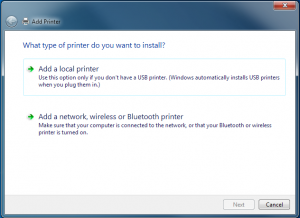
- Click on Add Printer. The Add Printer wizard will appear.
- Select Add a Local Printer and click Next.
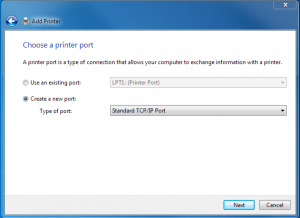
- Select Create a New Port and Standard TCP/IP Port from the Type of Port dropdown menu.
- Click Next.
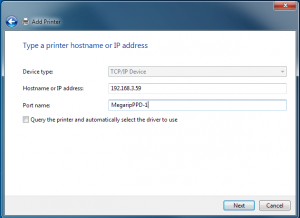
- Type a printer or hostname address:
- Device Type: TCP/IP Device
- Hostname or IP address: Enter the network IP address of the Windows computer running the Megarip Server (e.g., 192.168.3.25).
- Port Name: Enter a name for the Windows port (this is NOT the printer name).
- Uncheck the option to Query the Printer and Automatically Select the Driver to Use option.
- Click Next.
- Additional Port Information Required:
- Device Type: Custom.
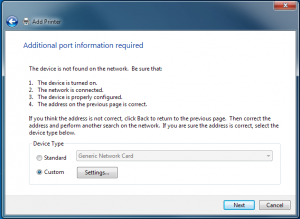
- Click the Settings button. A configuration window will appear.
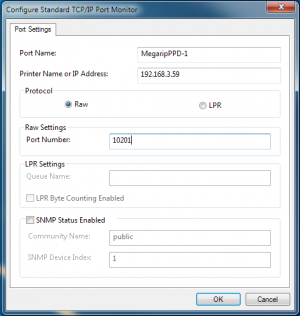
- Configure Standard TCP/IP Port Monitor:
- Protocol: Select Raw.
- Raw Settings Port Number: Enter the unique TCP Port number assigned to the Pagesetup to be published (e.g. 10200).
- Click OK to close the window and return to the Additional Port Information window.
- Configure Standard TCP/IP Port Monitor:
- Device Type: Custom.
- Click Next.
- Install the Printer Driver:
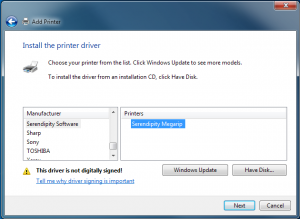
- If this is the first time installing a Megarip system printer, insert the Megarip Installation DVD and select the Have Disk option.
- Navigate to the /drivers/win/win_xp_vista_7/ directory.
- Select the Megarip.inf file and click Open. The Serendipity Megarip driver should now be displayed.
- If this is the first time installing a Megarip system printer, insert the Megarip Installation DVD and select the Have Disk option.
- Click Next.
- Note: The above step can be skipped for any subsequent installs of Megarip System printers. The driver can be chosen from the Windows printer driver list.
- Which Version of the Driver do you want to use:
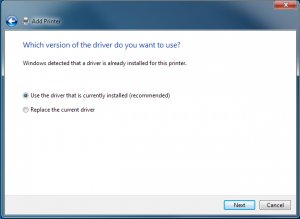
- Select Use the driver that is currently installed (recommended) unless you are replacing an older installed version of the Serendipity Megarip driver.
- Click Next.
- Type a Printer Name:
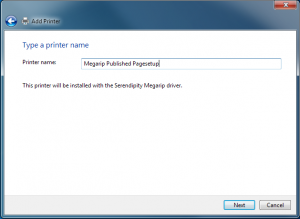
- Enter a name for the printer. This is the name that will appear in the Windows Printers list and be available as a printer option when printing from Windows applications. The name should be unique for the published pagesetup.
- Click Next.
- Printer Sharing:
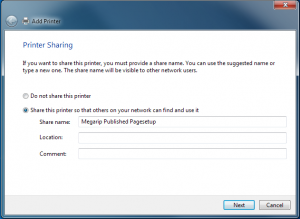
- Select Share this printer so that others on your network can find and use it.
- Keep the default printer name or enter a share name.
- Click Next.
- You’ve successfully added “Printer Name”.
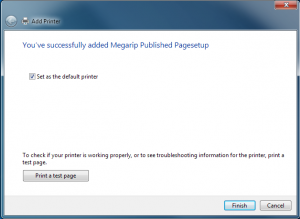
- Choose whether the published pagesetup destination is to be the default system printer.
- If desired, click the Print a Test Page button. The test page job should appear in the Megarip QueueManager.
- Click Finish to close the wizard.


