Serendipity Blackmagic (Soft Proofing Add-on) / Veripress 9.1+ adds a new PrintProof feature, providing extra functionality and utility to job SoftProof previews.
When activated, the feature creates a PrintProof preview within jobs, replacing the existing Printed (Rendered) preview.
Opened in Softproof on a colour-calibrated monitor, the PrintProof displays the job on-screen precisely as it will look when printed via the Media and Output device. The preview loads with the printer/device output ICC profile embedded, automatically normalising any device linearisation curves.
PrintProof provides two key benefits. Firstly, it allows Serendipity Blackmagic (Soft Proofing Add-on) users to accurately view how a job will appear after passing through the colour management system, prior to committing the job for printing.

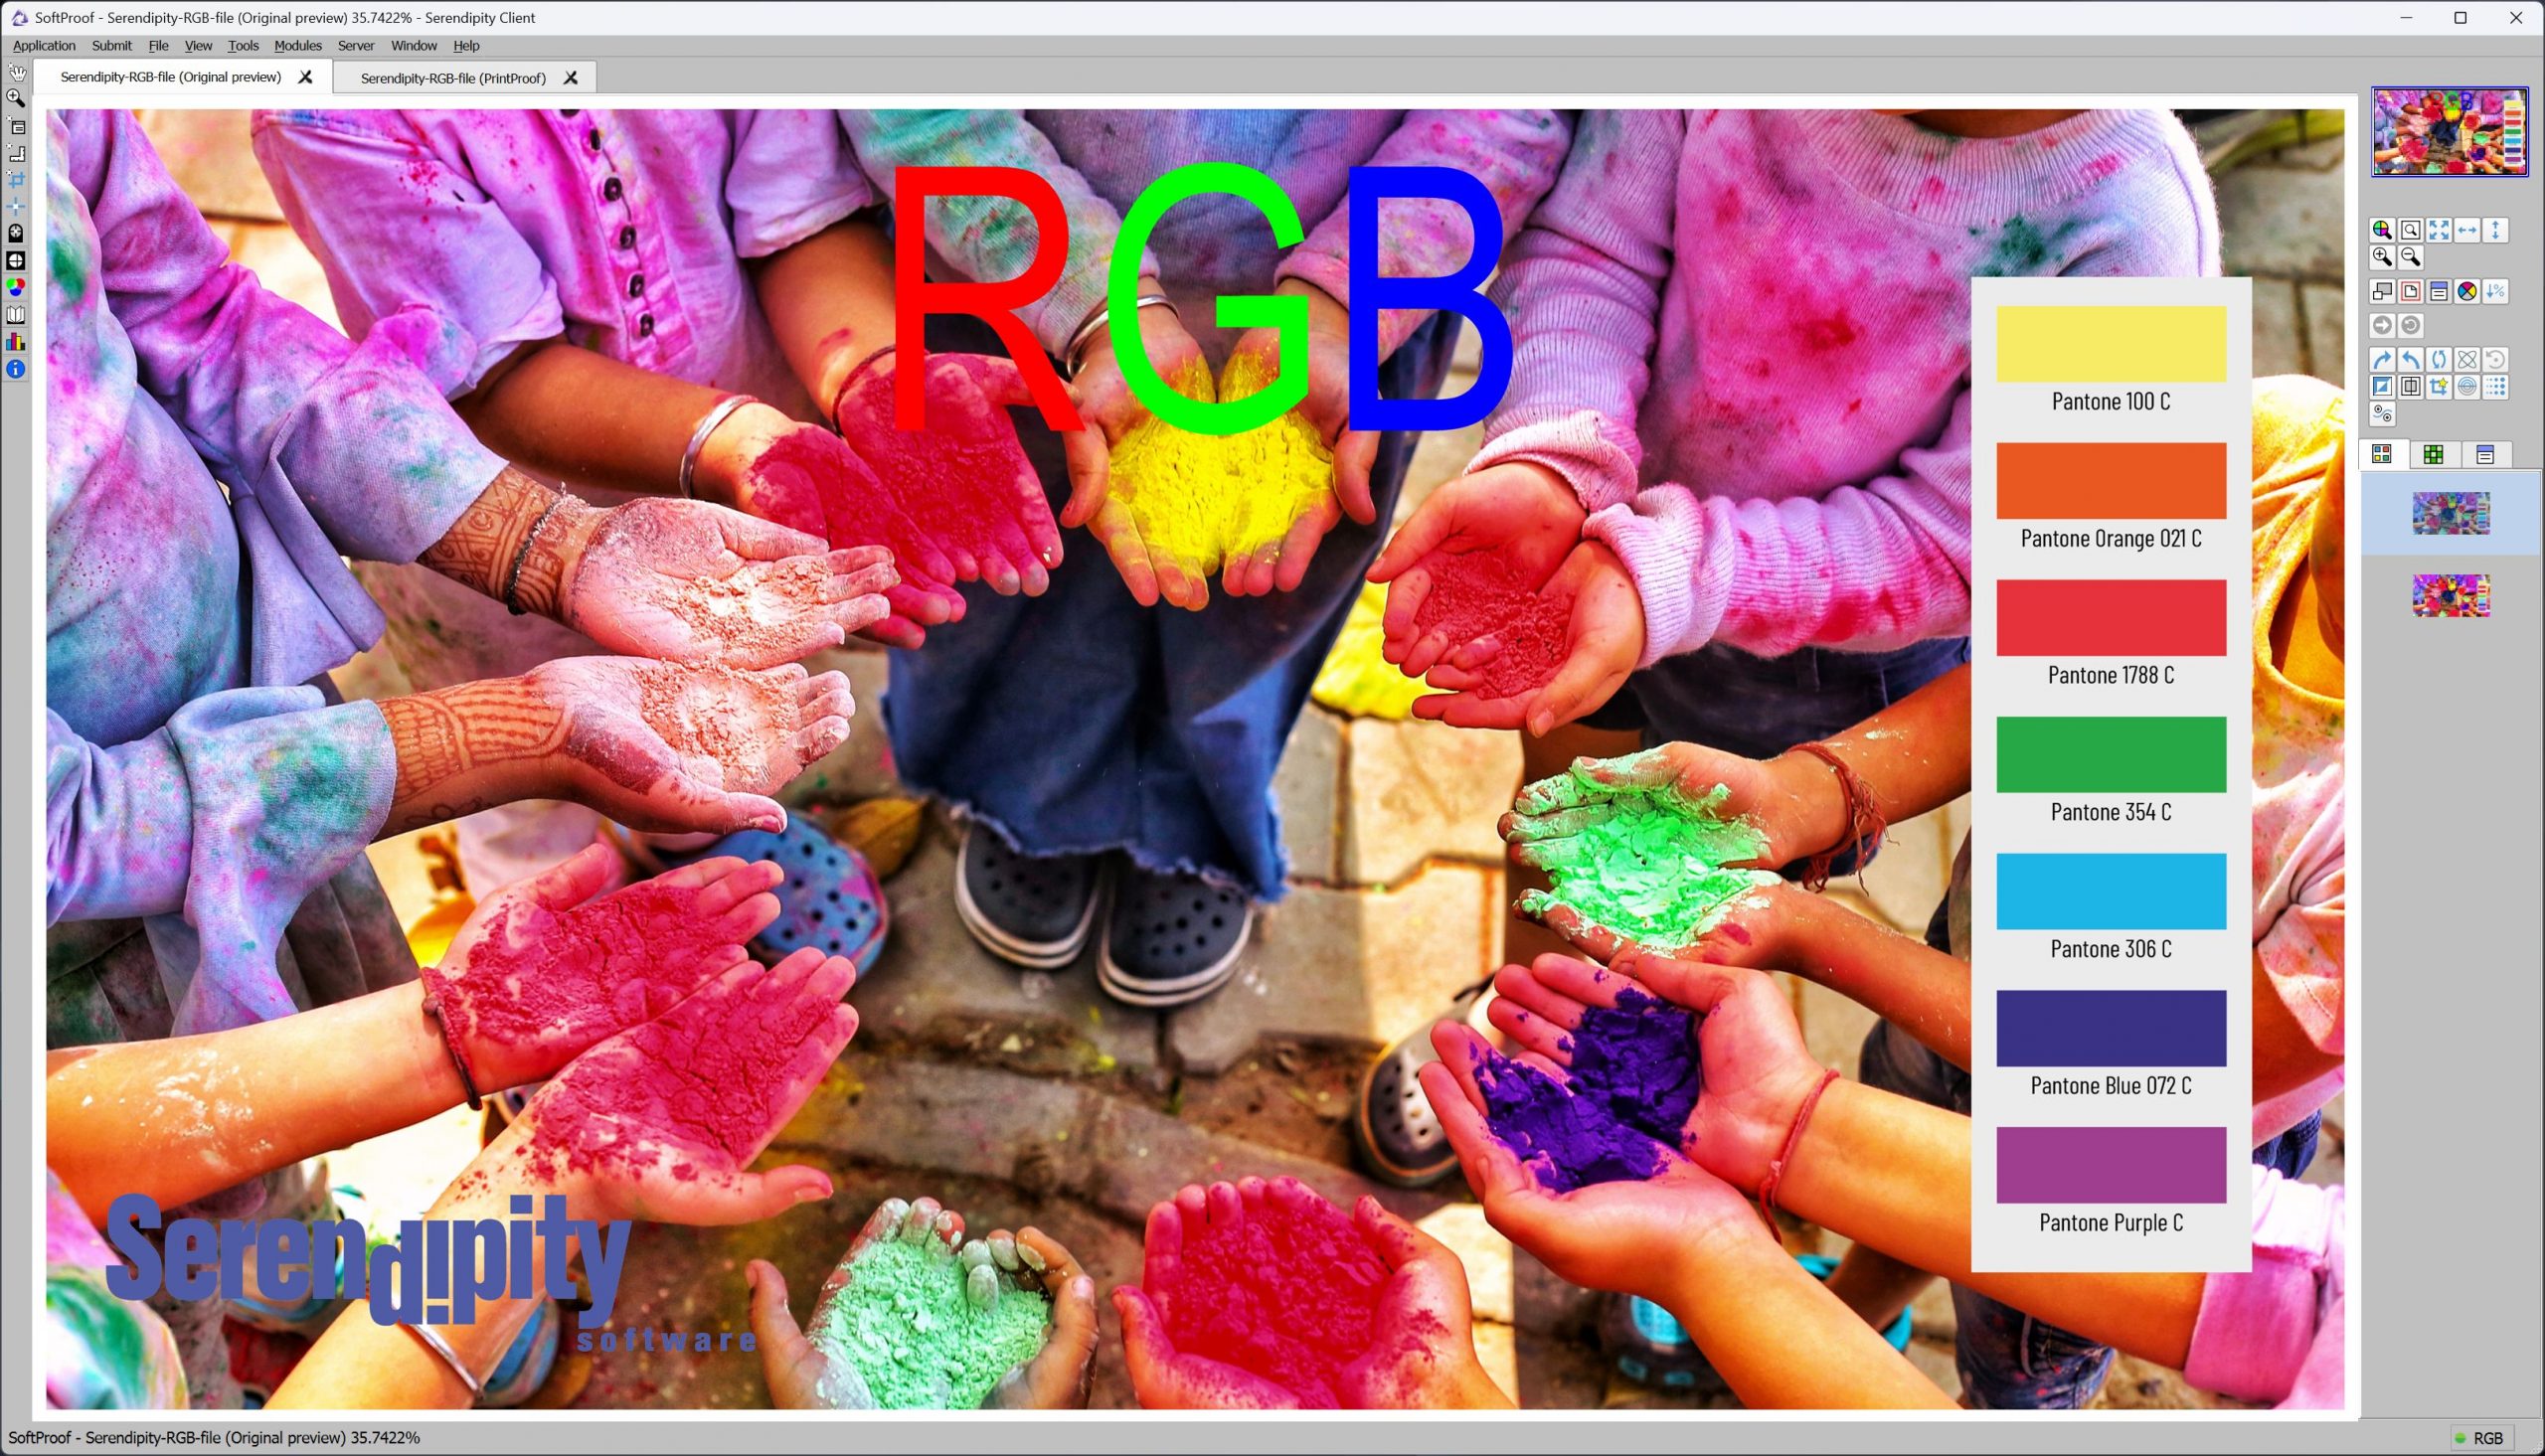
Original (Imaged) of the file which includes RGB Red, Green, and Blue, colours at the edge, or outside of a printable gamut.

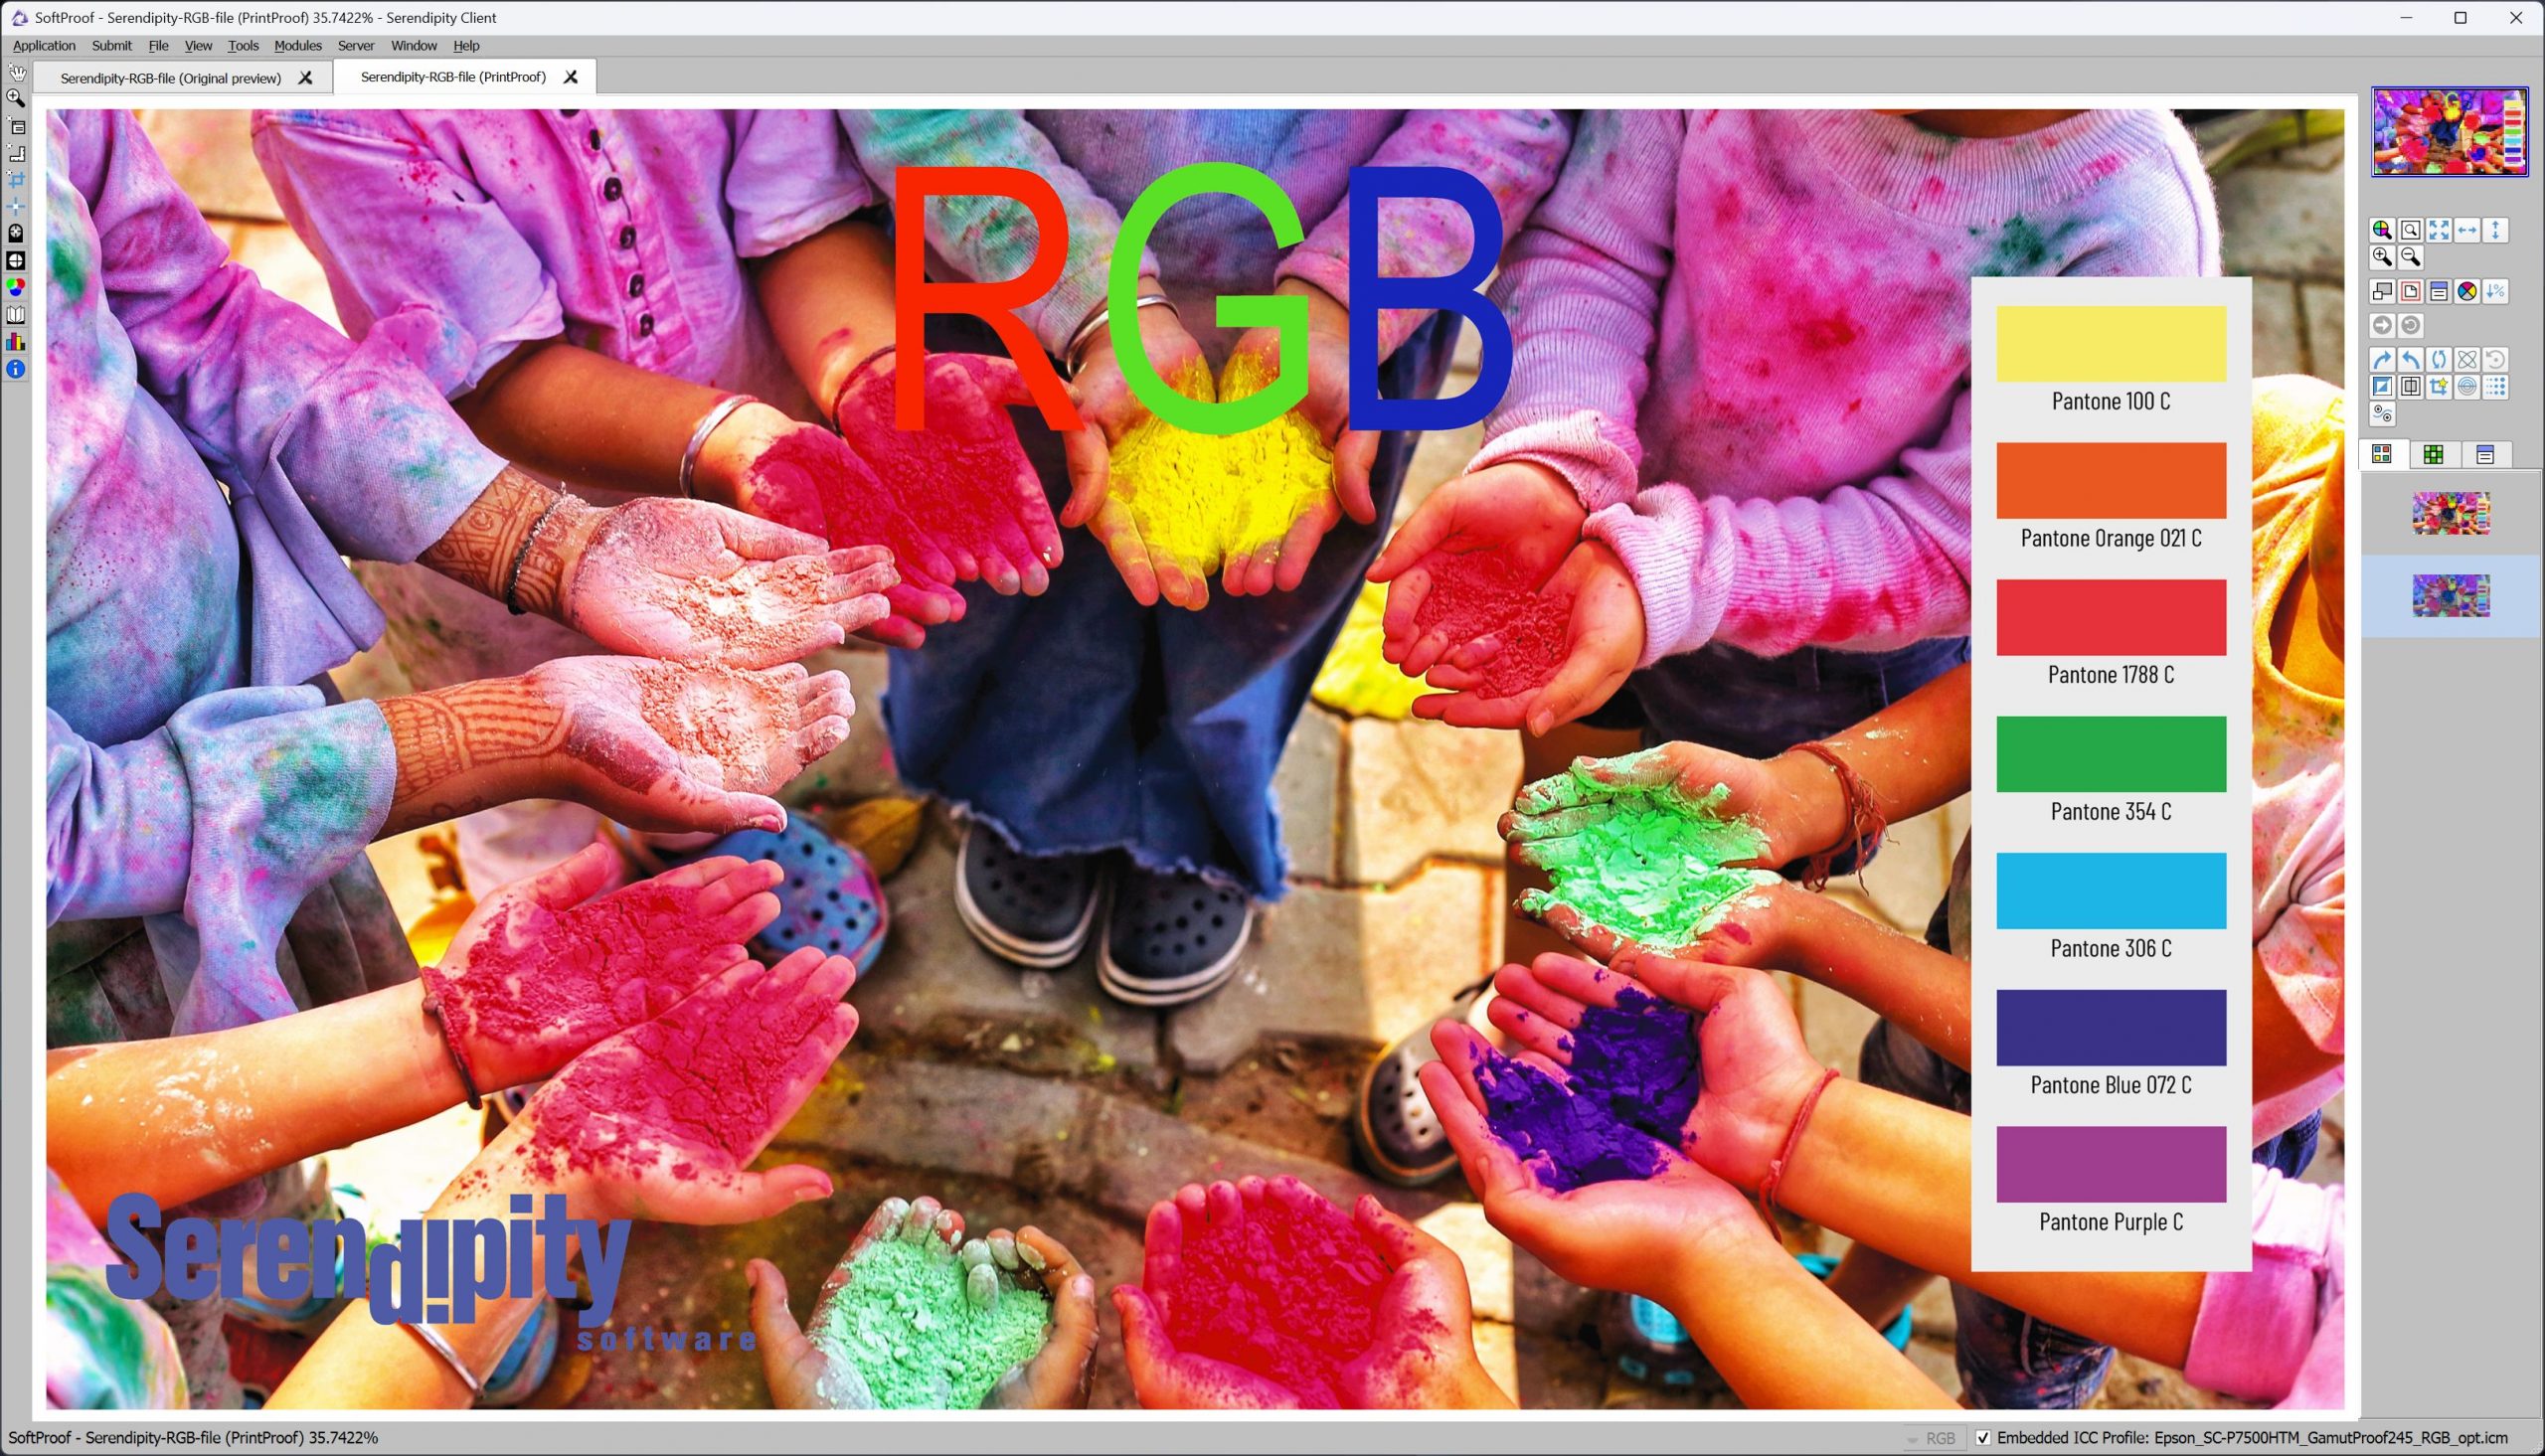
PrintProof displays the job as it will print. The job has retained its intended gamut. However, the “RGB” text has a slight colour shift, as these colours are outside the available printer gamut.
Secondly, PrintProof can be used with Veripress for proofing the print output of a workflow that does not use a Serendipity product for its primary colour management and printing, such as those used by the direct-to-garment and textile industries.
Enabling PrintProof
To enable the PrintProof previews for your workflow:
- Select the Jobticket data type in the Workbench application.
- Select the specific Jobticket to be used from the Items list.
- Go to the SoftProof Options panel.
- Click on the Generate PrintProof checkbox.

- Save the Jobticket.
Configuring SoftProof to display PrintProofs
In order to display PrintProof previews, the SoftProof application settings need to configured to Honour Embedded ICC Profiles on load:
- Open the SoftProof application.
- Select the File menu > SoftProof Settings… option.
- In the SoftProof Settings window, go to the View Options tab > On Load panel.
- Click on the Honour Embedded ICC Profiles checkbox.

- Click OK to save the setting.
Viewing PrintProof previews
To view PrintProof previews:
- Select the Job in the QueueManager.
- Press the View Printed… button in the QueueManager toolbar,

- or, select View Printed… from the contextual (right-click) menu on the job.

The PrintProof will open in SoftProof, using the Output (printer) ICC profile as the display Press (CMYK) or Camera (RGB) profile.

Note – remember as mentioned above, when Generate PrintProof is active, the View Printed button / menu option loads a PrintProof preview into SoftProof. This also applies to the Touch Console View Printed button.
Using PrintProof with Veripress to proof a third party colour workflow
Create an ICC profile characterising your print workflow
The first step required for proofing a print workflow outside Serendipity Blackmagic or Veripress is to obtain an ICC profile characterising the colour output of the print process.
To generate this ICC profile:
- Create an ICC target using your ICC profiling software, ensuring the target is generated in the colourspace used by your print process, e.g. CMYK or RGB.
- Save the target in the file format required by your ICC profiling software, preferrably in the same file format in which jobs are normally submitted for printing in your workflow.
- Submit the ICC target file to your workflow via the normal method used to submit jobs for printing.
- Measure the printed target using your ICC Profiling software and create an output ICC profile. This is the ICC profile that will be used by Blackmagic / Veripress to display your PrintProofs.
Configure Serendipity Blackmagic / Veripress to RIP jobs for proofing using PrintProof
- Open the Workbench in the Serendipity Client.
- Create a new Output, selecting Serendipity Blackmagic Image as the Output Driver. Save the Output.
- Create a new Media.
- Select Serendipity Blackmagic Image as the Output Driver.
- In Printer Settings,
- Set the Resolution to be used for the PrintProof previews.
- Select a Colourspace matching your print process, e.g. CMYK or RGB.
- In Colour Management,
- Click the Profile… button.
- Click Upload File… in the Choose ICC… pop-up window.
- Navigate to the ICC (.icc) profile file created in the first step above. Click Open and Save the ICC profile to the desired folder.
- Save the Media.
- Create a new Jobticket.
- In Colour Management > Manage,
- Tick the Always Use ICC and Honour Embedded Profiles checkboxes.
- If the jobs sent to your normal workflow are in a Postscript and/or PDF format, and designed in an RGB colourspace, in Postscript / PDF Options,
- Tick the Render in RGB checkbox.
- In SoftProof Options,
- Tick the Generate PrintProof checkbox.
- Save the Jobticket.
- In Colour Management > Manage,
- Create a new Pagesetup.
- Assign the Output… created above.
- Assign the Media… created above.
- Assign the Jobticket… created above.
- Save the Pagesetup.
Blackmagic / Veripress is now ready to proof your print workflow using PrintProof. To proof your files:
- Configure SoftProof to Display PrintProofs as per the steps outlined above.
- Submit your job files to the Pagesetup.
- View your PrintProofs previews as outlined above.
